A Self-Storage Guide for First-Time Renters
People like to shop a great deal. Now that you can shop almost anywhere, it’s rather easy to acquire more things. Over time, these can accumulate. Buying isn’t a problem in itself. It’s when your belongings start to get crowded, and you don’t know where to place them or even have the space to put them in. Sure, there’s the option to donate or dump some of them. But, what about those you wish to keep — those with sentimental value?
This is where storage units can come in handy. These are facilities you can rent to store your belongings. They are the perfect solution for businesses who want to clean out their workspace or families who need to keep their seasonal equipment.
If this is your first time renting a storage unit, you’re not alone. It can be daunting to find the right storage unit for your belongings. After all, these are valuables, and you want to keep them as safe and secure as possible. Knowing what to expect with your first storage unit rental will help make it a smooth process.
Types of Storage Units
- Interior units
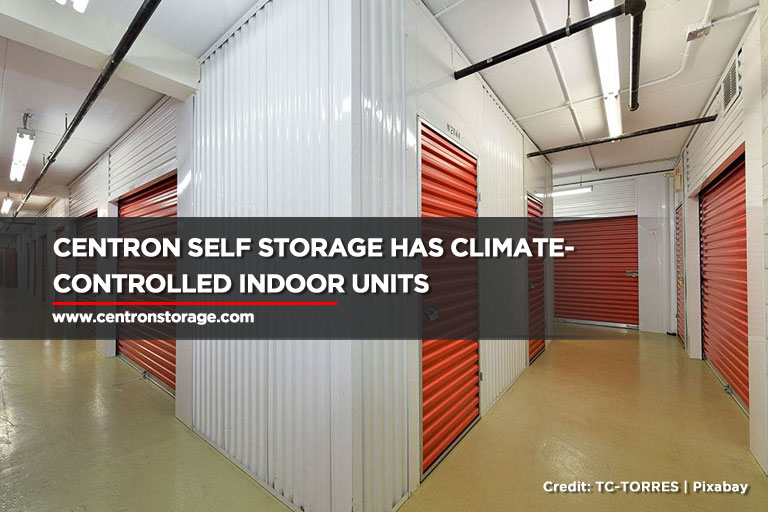
Indoor storage units are found within a building and have no direct access from the outside. While you can’t drive right up to an indoor unit, they often offer better weather protection. Indoor storage units provide some climate control, which means you don’t have to worry about the weather and exposure to outside elements whenever the door is opened. - Outdoor units
Outdoor storage units are still housed within a compound, but they can be directly accessed from the outside. Rather than entering a building to get to your unit, you can drive right up to the door. This is particularly useful when moving a large number of belongings or paying movers by the hour. The downside is, outdoor storage units often have limited climate control, and opening the door exposes your belongings to outdoor weather and the elements, making them more susceptible to moisture and dirt. - Climate-controlled units
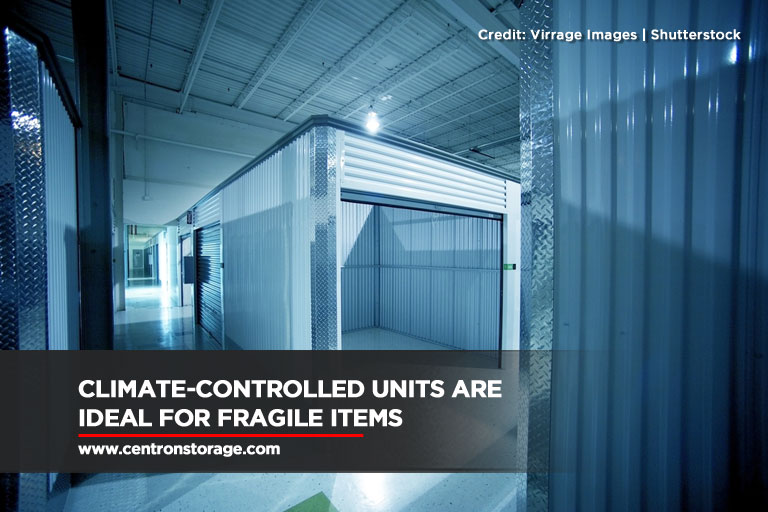
Climate-controlled storage, also known as temperature-controlled storage, is a type of self-storage unit specifically built to keep consistent temperatures and humidity levels. The temperature inside these units is strictly kept between 55°F and 85°F. These kinds of units are ideal for storing fragile items, such as furniture, electronics, and medical supplies,
- Portable Container Storage
This type of storage, also known as mobile storage, offers you a storage container at your home or business. Portable container storage rental is a popular option for people who are moving and need to store some belongings for a short period of time. The container is often brought to your home or place of business. Once filled, it will be picked up and stored at a commercial warehouse. Access to belongings will be limited until it is returned to your location. Such storage is ideal for items that do not require climate control and do not require frequent access.
Things to Consider When Choosing a Self-Storage Unit
There are numerous reasons why renting a self-storage unit is a good idea, but not all storage units and facilities offer the same perks and features. Here’s a handy checklist of things to consider when selecting a storage unit.
- Size
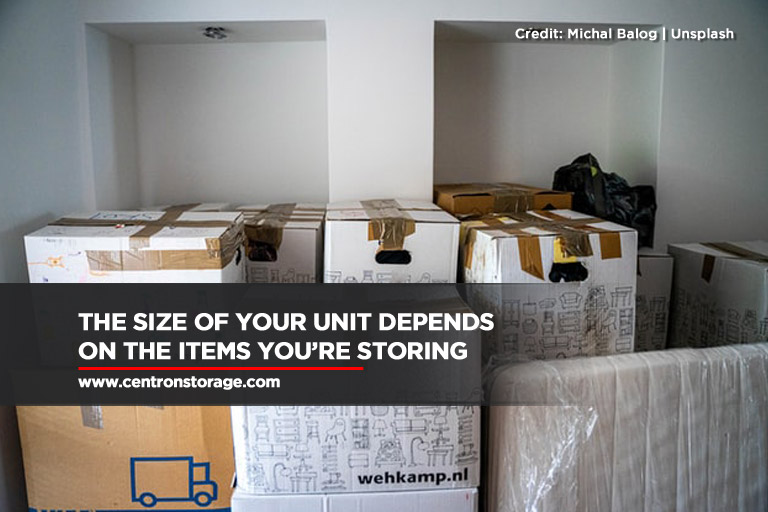
When it comes to storage units, size matters. If you’re going to rent a space, the floor size should be your number one priority, but don’t forget to consider the ceiling height as well. It will ultimately dictate how many items you can fit inside. Make a detailed list of the items you want to store to help you determine what unit size you’ll need. Keep in mind that the size of your unit will influence the costs of renting as well.
- Fees and Cost
Storage rental prices are another important consideration when selecting a storage space. The type of contract, the minimum length of time required, and any additional fees are all factors that can affect the total amount you have to pay. A month-to-month storage option may be less expensive, but keep in mind the additional fees that may apply if you make a late or missed payment. - Duration
Storage unit rental fees are usually charged monthly, so it’s beneficial if you know how long you’re going to need your unit. The majority of facilities accept short-term renters, while others have a minimum rental period. When selecting a facility, keep this information in mind. - Location
It is common for would-be renters to search “self-storage near me” when looking for a storage facility. The location for the storage is often a crucial factor. If you are planning on frequently accessing your items, it is best to choose a unit close by. On the other hand, if you are only storing your belongings for the summer, the location will be less important than the cost and other features. Also, bear in mind that some storage facilities outside of urban areas tend to be less expensive. - Safety and Security
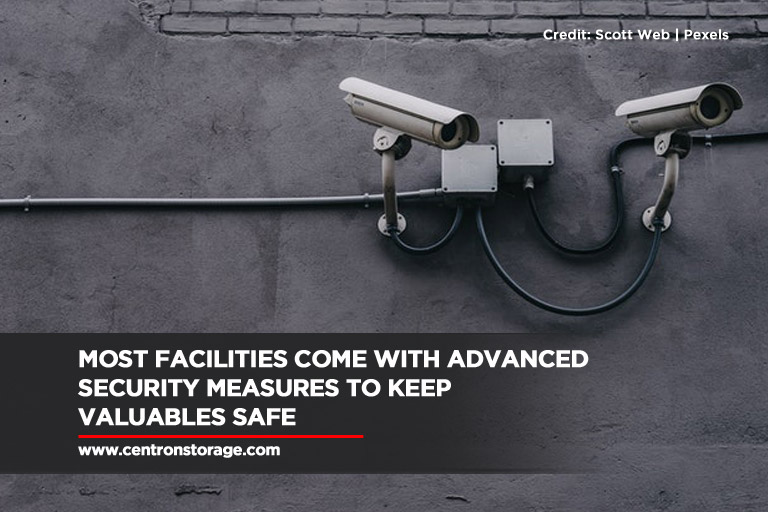
You will be leaving your belongings there, so knowing how safe and secure a self-storage unit is critical when renting one out. You should see if they have security guards, surveillance cameras, and gated entry points, among other things. Also, when conducting a site visit ahead of time, ensure that the entire area is well-lit. This will not only keep your items safe, but it will also keep you safe when you go to access your items.
Tips for Renting a Storage Unit
Here are some things you need to know to make the process of renting your first storage unit as smooth as possible.
- Research the storage facility before renting
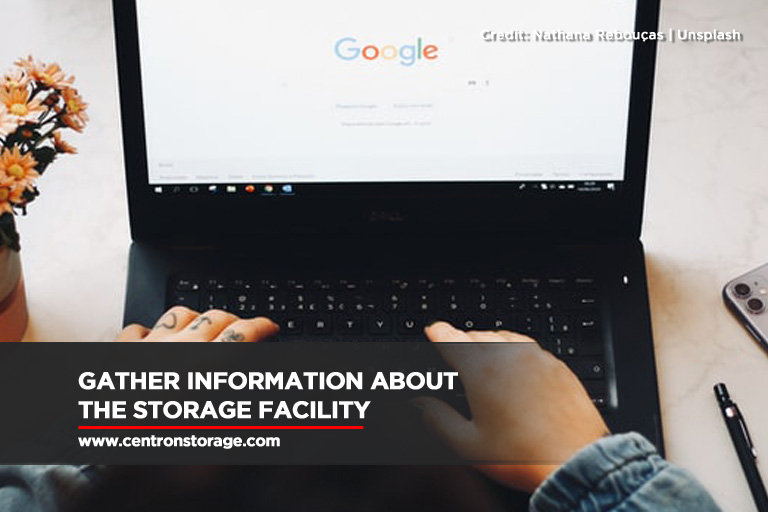
The first thing you need to do is see which storage facilities offer the best deal for their price. You can go and search online to see how local companies stack up against each other. As you do your research, don’t forget the factors you should consider, such as the location, size, and price. You can also contact the facility and be sure to communicate your concerns.
Here are a few things you should look into while doing your research.
- Hours of Operation
You must know when the facility opens and closes. You should also find out if they offer extended hours or if they have limited services on certain holidays. This is important so you’ll know when you can contact the facility and how early or late you can access your unit. - Locks
See what types of locks are used on the units, as well as the ones that are most recommended. Some facilities may also be selling padlocks, so you can also purchase locks from them. - Storage Unit Safety
It is important that you know how well the facility is dealing with security. The condition of the facility should also be part of your safety consideration. For example, a leaking roof will not only compromise your belongings but can also cause a slip injury. - Insurance
Research on all self-storage insurance options available, including how little and how much protection they provide, as well as the prices associated with each level. Also, check your homeowner’s insurance policy to see what it covers and what it doesn’t. Higher levels of coverage are better if you’re planning on storing expensive or highly sentimental objects. - Allowed Storage
Check what you are permitted and not permitted to store. This will allow you to decide whether you’ll need a specific type of storage, a larger floor size, or a different storage facility altogether. Also, don’t hesitate to ask for the contract. It usually mentions and explains why certain items are prohibited from storage. - Feedback and Reviews
Check online reviews when looking for a self-storage facility. See what others have to say about the facility, and whether or not the feedback is generally positive. - Identify what you want to store

It’s a good way to create a list of items that you’d like to start with and what you might end up storing later. Because the cost of renting a storage unit goes up with size, realizing what you’ll need to store will help you determine how big the storage unit you’ll need is. It will also help you estimate a budget.
- Determine which size storage unit you need
It’s often a mistake that renters make — simply guessing the storage size they’ll need. This can sometimes end up costing customers money because they end up with a space that is larger than they require. In other cases, underestimating can cause a lot of stress because you’ll already run out of space before you can finish unpacking.
Make an initial inventory of everything you intend to keep in the storage unit and for how long. Taking the time to measure your items before renting will help you accurately estimate the size and decide the type of storage unit you need.
- Decide on the type of storage you need
Some items can just be stored in a standard unit, but others may need special attention. Some goods, such as leather and wood furniture, electronics, and collectibles, are especially susceptible to temperature changes. If you plan to keep valuables like these, a climate-controlled unit is the way to go.
- Understand the rules and regulations
It could cost you money if you break some of these basic storage unit guidelines.
In the worst-case situation, breaching the regulations or terms of your lease could result in your belongings being evicted or auctioned off.
You should also be aware of your payment schedule, and remember to pay your rent on time every time. If you have difficulties remembering, see if an auto-pay option is available. Before renting, inquire with the store manager about any other details you need to know.
Read your contract from beginning to end to avoid misunderstandings and surprises. There could be penalties for late fees, and if you don’t pay within a specified amount of time, your storage unit may be repossessed.
- Bring the proper documentation on moving-in day

This is another important self-storage rental tip. When you arrive at the storage facility to move your goods in, you will be asked to provide specific documentation to complete the leasing process. Have all the required documentation ready, including a good photo ID, proof of insurance (or their rental insurance), and your current contact information.
- Know the move-out policy
If you ultimately decide to remove your belongings from storage, you must be aware of and understand the policies on moving out. Don’t hesitate to ask the storage company to explain all the procedures for moving out before you sign your contract and move into your storage unit.
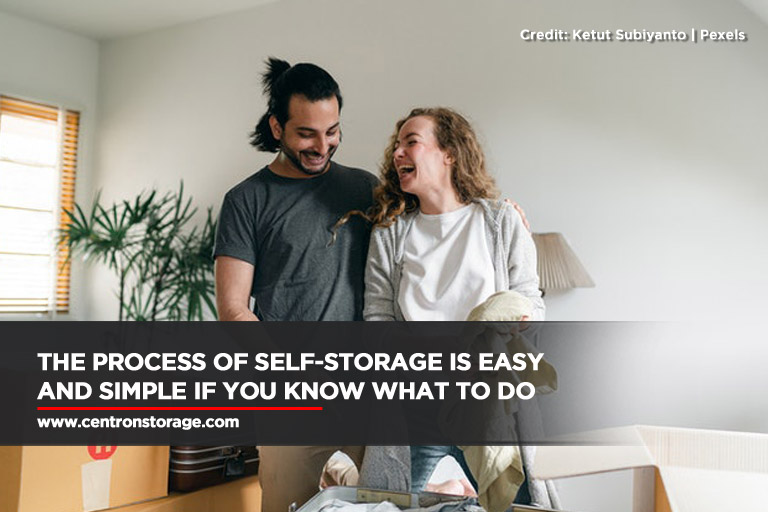
Renting a self-storage unit should be a simple, easy, and affordable process that even first-time renters can do on their own. Be an informed customer with this guide on how to rent a storage unit.
If you’re looking for a storage rental in North York that offers the most value for your money, Centron Storage is here for you. We offer different storage sizes all at an affordable price. Call our telephone number (416) 739-0000 to reserve yours today.
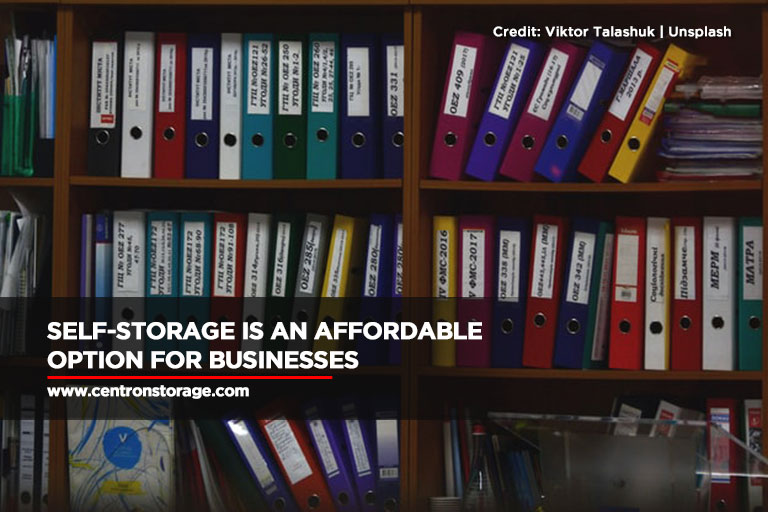
Business Storage Tips for Small Business Owners
When it comes to delivering products into the hands of customers crisp and on time, a business storage warehouse usually plays a vital role. Without it, it may be hard to organize and manage the entry and exit of deliveries, increasing labour costs and the likelihood of delays. Unfortunately, for people who are just starting out in business, the budget can be a constraining factor. Businesses are always looking for ways to save money while maximizing space to store important items such as products, inventory, paperwork, and spare equipment. If you’re facing this problem, a business storage unit may be the answer.
Why Do Businesses Need Self-Storage Units?
Most businesses often use self-storage to get rid of excess supplies, store seasonal items such as Christmas or Halloween merchandise, or temporarily keep office furniture and equipment while not in use.
If you’re still not convinced, here are more reasons why commercial storage is a positive thing for your small business:
- Decreases Clutter
The stockroom may not always be the most organized area of your establishment. As soon as new inventory arrives, they can become disorganized and cluttered fast, and you may run out of space in no time.
By using a separate storage unit away from your business, you can easily manage your excess items, and set aside only those that are truly necessary for your in-house space. Besides, when you place heavy equipment and filing cabinets in storage, it can also free up more space in your workplace.
- Maximizes Use of Office Space
Decreasing workspace is part of the growing pains of a small business. As you expand, inventory and supplies simply cannot be accommodated. For home-based businesses, they may often find their work spilling into other areas of the house, such as the garage or the living room.
Getting a storage unit for your small business allows you to store extra merchandise elsewhere. The space previously occupied by these items can then be converted into a new office. Using self-storage can be beneficial in this situation because it allows a business to grow by providing new space to conduct business.
- Ensures Security for Valuables
Small business owners don’t have the luxury of solid in-house storage. Most valuables are instead placed inside a makeshift storage room, or sometimes inside their own houses like the basement or garage. As a result, these things are vulnerable to theft and damage.
Self-storage units, on the other hand, allow small business owners to take advantage of advanced security measures that come with the facility. These include security guards, passcodes, authorization, surveillance cameras, and gated entry. On top of these, they are also built with fire and disaster safety in mind, so you can rest assured that your items are safe in the event of an unfortunate incident.
- Enhances Safety
If you’re a mechanic, landscaper, or construction contractor, you may always be around heavy equipment and potentially hazardous items, like saws, hammers, drills, and ladders. Worse, if you are a home-based business, these tools and equipment are risks to the rest of your household and must be kept out of reach of children.
As often is the case, you won’t be needing all this equipment for every job. Keeping extra inventory and construction materials in a self-storage unit is the perfect solution, not only are they convenient but also safe.
- Offers Exclusive Access
Because of the strict security measures, tenants are provided with their own set of locksets, keys, and access codes to their storage space. That means your belongings are doubly protected because almost no one else has access to this sensitive information. There is no way for anyone else to access the contents of the space, but it’s easy for tenants to get in and out of a facility with their code.
- Costs Less
Whether you run an independent contractor business or a retail store, you would surely be running on a budget. If your resources are already constrained, it’s not always possible to move to a larger space. Renting a small business storage unit is a cost-effective alternative to paying more per month for a large, expensive lot. Get the room you need without breaking the bank with this innovative storage solution.
Small Businesses That Can Benefit From Self Storage
Many businesses find self-storage to be an excellent option. You can use it as a storage solution for your documents, inventories, and more. Some of those who enjoy the benefits of self-storage include:
- Construction Subcontractors
It is rare for subcontractors to have their own office space, but they still need a lot of storage space to store their supplies, such as sheetrock, lumber, cement, and nails. Transporting heavier items is made easier by loading docks at storage facilities, which are available for heavy items as well.
Self-storage offers contractors flexibility and convenience. You can rent a unit near the construction site, saving you valuable time driving from one location to the next.
- Food and Beverage
In the restaurant and catering industry, excess supplies, equipment, and tools are a common occurrence. These include ingredients, utensils, banquet tables and chairs, china, and glassware, and you’ll need somewhere spacious to store them. Unfortunately, you also need to devote as much space for dining as possible to maximize profits. The best solution is to have a storage unit that your crew can easily access when necessary, leaving you more valuable space for other events.
- Law and Medical Firms
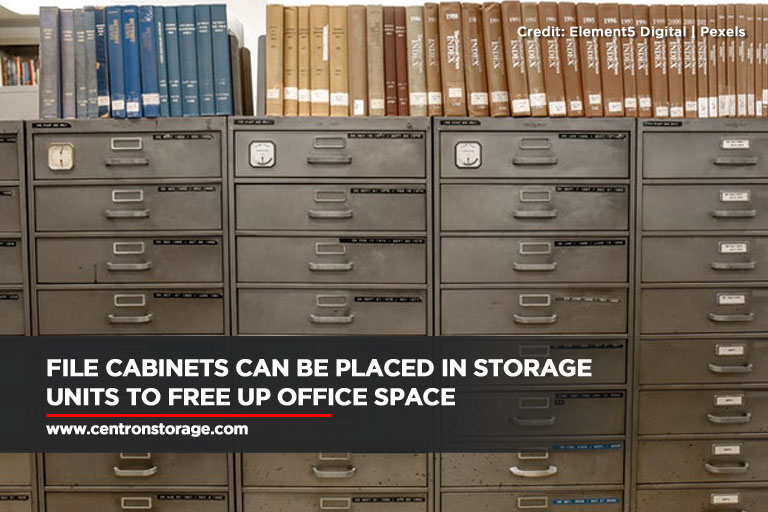
Unless you are completely digital, running a business involves a lot of paperwork that tends to pile up quickly. It’s easy to start using filing cabinets, but as you accumulate more and more paper, filing cabinets can quickly outgrow their usefulness and begin to eat into your valuable workspace.
Since many law and medical employees are required to keep hard copies, small business file storage containing financial records, invoices, and tax documents can be safely stored in storage units equipped with climate control.
- Retail and Commerce
A retail business can always benefit from additional storage space, whether they have a physical store or sell exclusively on the internet. Inventory, marketing materials, and trade show supplies can be safely stored in self-storage units without compromising their integrity.
It can also help businesses better prepare for seasonal sales by acquiring merchandise before the holiday season’s peak sales period. Another option is for businesses to buy clearance stock that they can later resell at a regular price through strategic buying.
How to Organize a Business Inventory in Storage
Renting self-storage can be a great tool for optimizing your business and managing your inventory, but only if you can properly keep track of your inventory and supplies. Here are some self-storage tips for businesses on how to store and organize your inventory to make the most of the self-storage facility:
- Make a List

The essence of storage doesn’t end with simply storing; you should be able to retrieve them easily. You’re putting them inside in hopes of needing them and finding them again in the future. As a result, it’s essential that you first make a list of everything you intend to store in self-storage. Take a look around your office and see what you can store to free up some space. Ask yourself what you need in the office on a daily basis, and what can be put in the storage unit to make room for new items. Many documents can also be stored in a safe place outside of the office as well.
- Pack Properly
It is important that you don’t rush your packing. If you want to keep the integrity of your inventory and supplies, pack efficiently. Sort and store small items in new, sturdy boxes, bubble wrap, and bins. Store items you aren’t planning on using for a while at the back of your unit and place those you use more frequently in front. To keep files organized and visible, store them in boxes or plastic bins that are specifically designed for this purpose. Avoid using random-sized containers and boxes as they may be unstable when stacked and cause them to collapse, making it difficult to retrieve them.
- Check Storage Capacity
Be sure to review storage capacity, which is the maximum amount that something can hold. Multiply height x width x depth to get the cubic foot storage capacity. How many bins can it hold? How high can you stack them? How evenly spaced are they? This allows you to properly plan out how to place your containers inside and maximize every bit of space you’re paying for.
- Organize Floor Plan
Well-organized spaces should be safe not only for the items but also for your employees to move around. There should be a clear order of operations in the flowchart. There should be clear zones for receiving and shipping. Especially, if you are storing varying merchandise, they should also be properly segregated. For example, if you are a restaurant, you need to designate separate areas for ingredients, utensils, and furniture.
- Map and Label Everything
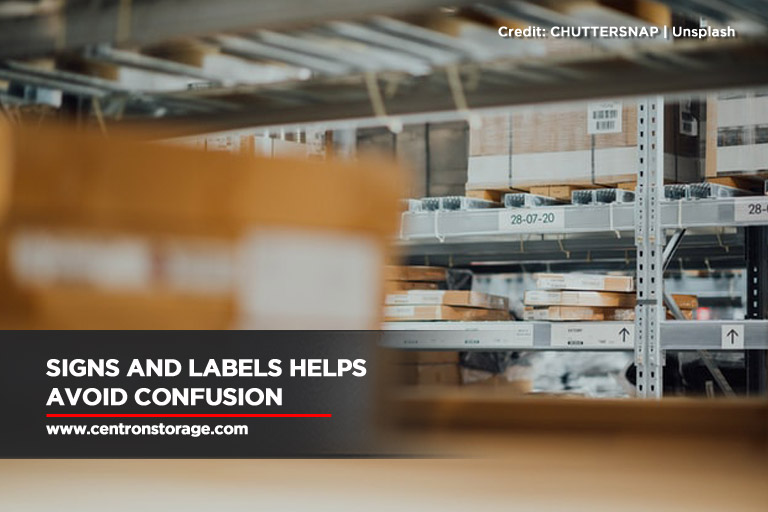
This is a simple tip that you can put into action right away. Labelling your storage’s inventory and zones will help you maintain long-term organization and facility flow. You’ll need labels once you’ve established your warehouse layout so that employees know where to find what they need. For new employees or in facilities that frequently use temporary workers, this can be a huge asset.
Maps can assist your employees in finding their way around. For new or seasonal employees who may not be familiar with the facility, maps can be extremely helpful in guiding them to the right location. And the more quickly people reach their destination, the more quickly they can complete their tasks.
- Assign Receiving Areas
Receiving areas are necessary for sorting and moving new inventories to the appropriate area as soon as it’s obtained. Sometimes, the designated receiving area is near a receiving door. If you want to know how much room you need, estimate the average size of your deliveries.
Items with shelf life or expiration date in your warehouse inventory should be placed behind the older inventory so that you can move products in an orderly manner. Train all stocking employees to use the “First In, First Out” inventory control method to avoid expired or wasted items.
- Maintain Storage Upkeep
For a storage facility to stay in order, it’s vital to keep it clean. Hard work can go to waste because of the “set it and forget it” mentality. Regular maintenance prevents inventory damage and increases productivity. During the course of business, items are removed from the shelves and put back on the shelves. There should be a system in place where equipment and tools have a designated place to be stored and should be returned when finished with them. The aisles should be free of clutter and clean, so as to avoid confusion when items appear in inventory reports but not on storage.

Self-storage can be used in a variety of ways to streamline your business operations. You can set yourself up for a successful business today and in the future by organizing your storage today.
If you’re looking for storage space for rent for your business needs, Centron Self-Storage is the right place for you. With on-site package delivery acceptance, dock level for truck deliveries, individual mailboxes, and carts and dollies available, our services are perfect for your small businesses. Call us at (416) 739-0000 to reserve your storage space today!
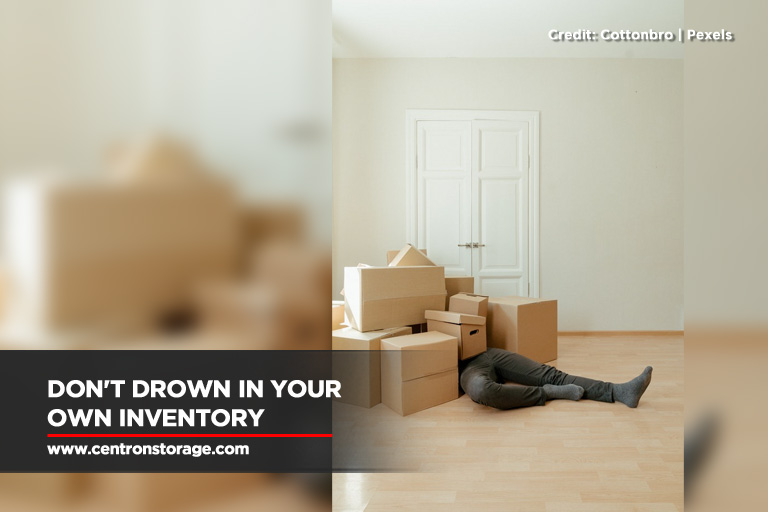
Common Self-Storage Mistakes to Avoid
You’ve reserved a storage unit and are eager to fill it with your belongings. They are excellent places to store your possessions while you’re moving, decluttering, making extra space in your home, or running a business. However, when it’s time to put your items in storage, it can be tempting to just throw everything in, close the door, and walk away.
The benefits of self-storage are tremendous but only if you store your items the right way. Packing, moving, and storing your belongings, like most things, needs careful consideration and planning. Not thinking ahead is a rookie mistake. Take a look at these common self-storage mistakes and storage unit organization tips so you can get the most out of your space.
What You Can and Cannot Store in Self-Storage
First, it is important that you are aware of what you should put and not put in storage. Understanding storage guidelines not only help you organize efficiently, but it can also keep you safe and even healthy.
Here’s a general list of what you can and cannot store in a self-storage facility — most of them are pretty straightforward:
Can:
- Appliances
Refrigerators, stoves, microwaves, washers, dryers, and freezers are all included. Appliances can be stored as long as they are cleaned and dried before storing and remember to never leave them plugged in. Smaller equipment, such as toasters, coffee makers, and vacuum cleaners, are also acceptable as long as they are free of crumbs and dried-on drips. - Business Files
Self-storage is becoming more popular among businesses for relocating and offsite storage. The cost per square foot is also way lower than a warehouse or additional office space, so it wouldn’t eat up much of your company budget. Self-storage is also ideal for small business owners such as realtors, caterers, home stagers and organizers.
- Electronics
Even though many people can’t go on with their daily lives without electronics, TVs, audio systems, speakers, computers, and printers all need to be stored from time to time. Given how expensive these items might be, it’s worth making sure you have the proper place to store them safely. It is also recommended that you keep items in a climate-controlled storage container for the best protection. Just make sure to remove CDs, DVDs, inkjet cartridges, and batteries from your electronics before storing them. These are items that might become stuck or corrode over time. - Household Goods
Furniture, toys, food and bathroom supplies, books, clothes, and other objects are among the most commonly stored items in self-storage units. Keepsakes, collectibles, and antiques also fall into this category. The ideal option for valuable items is climate-controlled storage, which regulates both temperature and humidity to keep your prized possessions in good condition. - Seasonal Items
Self-storage and seasonal items are a match made in heaven. There will always be things that we only need or require at specific periods of the year, from Christmas decorations to camping gear. Keep in mind that seasonal items include clothing and winter gear as well. And, a storage container is a fantastic place to keep them all.
Cannot:
- Hazardous Materials
The list can be long and complex, but the general rule of thumb is it’s a no if they are flammable or explosive. Gasoline, propane, oil, grease, chemicals, cleaners, aerosols, and paint are all examples of this.- If you are storing art supplies, leave the mineral spirits or paint thinner.
- If you are storing bathroom and kitchen items, remove nail polish removers, aerosol sprays, like hairspray and cooking spray.
- If you are storing gardening supplies, get rid of the weed killer and fertilizer.
- If you are storing lawn equipment, drain the oil and gasoline first.
If you have non-hazardous liquids, such as non-toxic paint or beauty supplies, make sure they’re kept in airtight containers or bags so they don’t spill or leak. Other than that, dispose of any unwanted hazardous goods. Check with your local waste management organization how.
- Living Things
Living things include animals, plants, and people. We’ve heard some bizarre stories of folks who took self-storage literally and converted them into housing units with their pets. Storage units are simply not fit for human habitation. Various local and federal housing laws prohibit such acts, and you can face potential criminal charges if you do so. Plants are the same way. Not only will they perish, but their soil will collect moisture, resulting in mould, mildew, and bugs. - Perishable Goods
It’s perishable food if it needs to be kept in the refrigerator. This means meat, dairy, and produce should not be stored in self-storage at all costs. Non-perishable foods, on the other hand, are generally fine as long as they are stored in sealed containers.
Keep in mind, though, that there are several exceptions. Non-perishable goods, even those freeze-dried or dehydrated, rice and other grains, powdered milk, boxed goods, flour, and pet foods can go rancid, smell bad, and attract pests.
If you’re storing canned foods (tinned or in glass canning jars), make sure to check the expiration dates and any broken containers that could introduce moisture or bacteria.
- Scented or Wet Items

These items are often overlooked, but you don’t want to store objects that are moist (even damp) or have strong odours. Moisture can introduce mould and mildew in your storage unit. So be sure to dry them before storing. If you’re moving on a wet, rainy day, carry a couple extra towels to dry off any damp goods, and then take those towels home with you. Don’t just drop them into a storage unit’s corner!
Rodents and other unpleasant pests are attracted to scented candles, potpourri, and other fragrant things. They may wreak havoc on your belongings once they’ve gained access to your storage space, gnawing through wiring, furniture, and whatever else their keen teeth can demolish.
12 Mistakes You Should Avoid
When renting a storage facility, take the time and extra effort to avoid these blunders so that you don’t end up with damaged items or a miserable experience.
- Using the Incorrect Box Size
Using random-sized boxes is one of the most typical mistakes made by homeowners when packing for a storage unit. While recycling old liquor or fruit boxes is a wonderful idea, it makes it hard to achieve consistency and uniformity when organizing or stacking them up. Instead, use designated moving boxes, which come in three sizes: small, medium, and large, to save you the trouble of sorting things out. This makes stacking the boxes a lot easier, and it saves you time. - Using Newspaper As Wrapper
Even if you have the best of intentions, newspaper ink can smudge and bleed all over your items, especially if you don’t use a climate-controlled storage facility. You’ll be faced with the task of unpacking filthy belongings, some of which may be irrevocably ruined or tarnished. It’s preferable to use bubble wrap or ink-free paper — even a cheap roll of butcher’s paper is a better option. - Using Plastic Bags or Cardboard Boxes
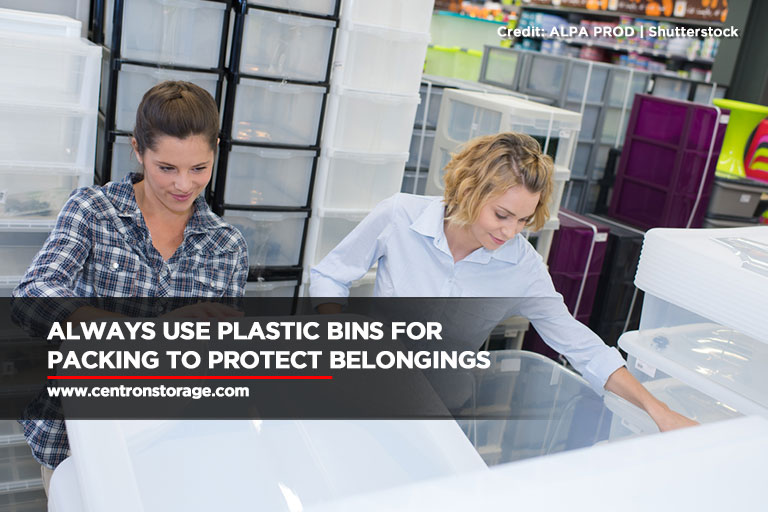
Using plastic bags or cardboard boxes is a bad idea because. Plastic bags provide little to no protection for your belongings and cardboard boxes can attract moisture and pests. Instead of using either one of these, opt for plastic bins. These are sturdy and not prone to moisture, providing better protection for your items
4. Not Packing Correctly
While there is no one best way to organize a storage unit, systematic planning and packing of different items go a long way in ensuring efficient use of your storage area.
Picture frames, porcelain, fine china, and platters should be covered in bubble wrap and sandwiched between two pieces of thin cardboard. This protects the products from breaking during shipment by cushioning them. Food should be packed separately in airtight containers. If possible, furniture should be disassembled. Use padding and packing peanuts to protect larger, heavier objects.
Always put the heaviest and most durable objects at the bottom of the storage unit, place household items you expect to use frequently in front, and be sure to leave a passage as you fill your storage unit to the maximum capacity so you can still reach all of your belongings.
5. Moving Too Heavy Boxes
Most people also make the error of storing heavy objects in a single box. It not only makes the box difficult to transport but also jeopardizes the box’s stability. How many times have you seen someone lifting a large box and the contents begin to slip out of the bottom? To avoid this, divide heavy items among numerous moving boxes and limit each box to no more than 40 pounds.
6. Not Leaving Enough Time
One of the worst things you can do when moving is to leave everything until the last minute. You’ll be more prone to tossing boxes in a hurry, damaging or crushing your stuff, as well as injuring yourself. This could also cause you to be behind schedule. As the saying goes, haste leads to waste, and this is certainly true when it comes to packing. Do yourself a favour by planning your move ahead of time. Allow plenty of time to organize your storage facility and hire expert movers to assist with the heavy lifting.
7. Forgetting to Label Your Boxes
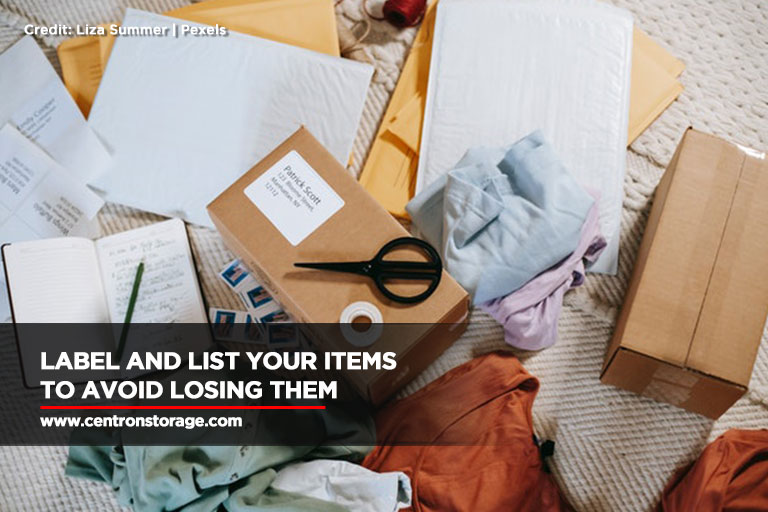
Going through unlabelled boxes in a self-storage unit is like finding a needle in a haystack. Even if you plan to return and completely unpack your storage unit, it will help you and your moving company if you know where each box should go as you unpack.
Make an inventory of everything you’ll be putting in your storage unit. Label the boxes so you know where to look. Knowing what’s in your locker or mini-storage unit is also beneficial from an insurance standpoint.
8. Choosing the Wrong Storage Size
It’s difficult for first-time tenants to predict the correct unit size they need. While smaller units are less expensive, cramming all of your stuff into a small space is never a good idea. You may save money now, but you risk damaging your belongings in the long run. If you’re not sure what size unit will work best for you, use a storage calculator. It can help you visualize each storage container size and what may fit into each one.
9. Not Cleaning Before Storing
Cleaning is critical in preserving the condition of your items. Mould growth, harmful germs, pest infestation, and rapid decay can all come from uncleaned stored items. It can start with a single thing and expand to the rest of your belongings. Simply wiping them dry and dusting them can make all the difference.
10. Not GettingStorage Insurance
Insurance is in place to protect your things in the case of a fire, theft, and other unforeseen events. Generally, storage facilities need you to sign documentation stating that they are not responsible for any items that are lost, damaged, or stolen. As a result, if something happens to your belongings, you are fully responsible for their replacement. You need insurance that covers all goods in the self-storage facility for the safety of your personal belongings. Even if the possibilities of untoward incidents happening are slim, it’s always better to be safe than sorry.
11. Failing to Check Storage Security Features
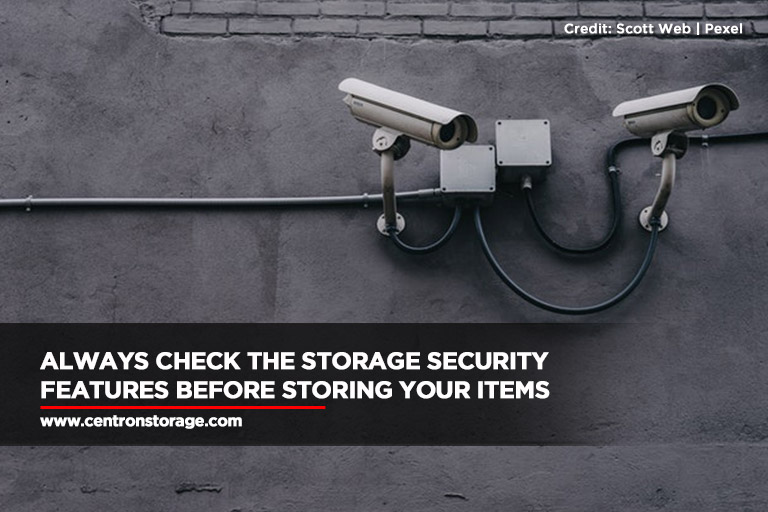
When it comes to choosing storage space, many people forget this crucial factor. It’s easy to believe that as long as your goods are sealed inside the storage facility’s compound, no one will steal them. Never take security for granted.
When looking for a storage unit, make sure to look at the safety features. Though the storage management ensures that your items are secure, it is still a good idea to conduct your own research on how you can keep things safe in a storage unit and voice any issues you may have. Inquire about your concerns because the protection of your stuff is the most important factor.
12. Storing Prohibited Items
While getting a storage container can help you organize your house, there are some items that you simply cannot put in one. This includes food, plants, pets, and flammable materials. If you have any queries about what you can and can’t store in your storage unit, contact the facility manager for clarification.
To make self-storage simple and successful, keep these storage tips in mind. If you own a storage unit and have been committing any of these mistakes, now is the time to remedy that. Not only will this help you preserve the integrity of your items, but it will also help you in organizing your unit.
Looking for self-storage units for rent in North York? Centron Self Storage offers secure storage units in various sizes to meet your space needs. Reserve yours now at (416) 739-0000.
12 Items You Should Keep in a Climate-Controlled Storage Unit
Storing your items in a self-storage unit is useful if you want to free up more space in your home, or when you are moving out, or even when you need temporary storage for your stuff. But did you know that there are specific items that are sensitive to temperature changes and may be damaged if you rent a regular storage unit?
A lot can happen to your stuff while it’s sitting in storage. Moisture can build-up, it can be exposed to extreme temperatures, and the most common concern is pests living in your storage unit. How then, can you make sure that your items are in the same condition they were when in when you put them in storage?
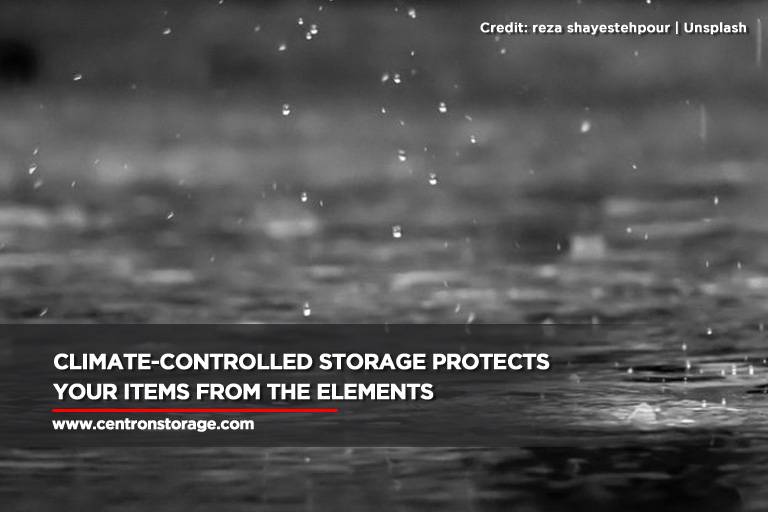
A climate-controlled storage unit is the solution. Climate-controlled storage units keep your possessions protected from the elements. While they cost a little more than traditional storage units, the many benefits you get from climate-controlled storage make them worth the added investment.
What Is Climate Controlled Storage?
Climate-controlled storage, sometimes referred to as temperature-controlled storage, is a special type of self-storage unit that is designed specifically to maintain steady temperatures and humidity levels. The temperature inside these units is strictly maintained at 55°F to 85°F. Unlike storage units for rent located outdoors, climate-controlled storage units are most often found indoors.
Temperature and humidity are important factors since they work together to create moisture. Humid air is hot air, and where there’s more heat and more humidity, moisture follows. Keeping both the temperature and humidity controlled and steady means that moisture can’t form and your items stay protected.
There are benefits to these maintained temperatures. For items that are sensitive to environmental conditions, or those of great value, the stable temperatures give better protection against damage, which is important especially if you’re storing your items for a long period of time.
You also don’t have to bend over backwards to find a climate-controlled storage unit because most self-storage facilities, especially with interior storage units, offer this now.
Do I Need Climate Controlled Storage?
Renting a climate-controlled storage unit can be costly compared to just getting a regular storage unit. If you’re not sure whether you need this feature, here are a few factors you need to consider:
- Length of Storage
You need to consider how long you’re storing your items. If you only need the storage for a short period of time, and you only need it because you’re moving, then you probably don’t need a climate-controlled unit. You just need to make sure that you will be able to get your items in a timely manner since heat, cold, and humidity can eventually damage some of them.
However, if you’re placing your items in storage for a long period of time, climate control is very important. This is applicable for Christmas decorations and winter clothes. People only use it for a short time every year, so keeping them in climate-controlled units for the rest of the year will help them last longer and maintain their quality for a long time.
- Geographical Location
When you are located in a place where you experience extreme temperature conditions, a climate-controlled storage unit is a must.
Places that are prone to extreme heat put items like CDs and vinyl records at risk since they can warp and/or melt. Your wine can also turn cloudy or brown when it is exposed to heat.
You also need climate-controlled storage if you’re in an area that experiences extremely cold temperatures since this can freeze objects that retain moisture. If exposed too long to the cold, these items can crack, expand, and contract unless kept under controlled conditions.
High levels of humidity can also be damaging to many items. Extreme humidity encourages the growth of bacteria, mildew, and mould, and can even attract small pests. With climate-controlled storage, you can make sure that you have a clean and dry space for your items.
- Type of Item
One of the biggest factors when deciding whether to get climate-controlled storage is the type of item you’ll be storing in it. You can get climate-controlled storage units to house objects that are sensitive to temperature and those with sentimental value.
Heirlooms and old photographs can be costly and, in most cases, impossible to replace. That’s why these are best kept in a climate-controlled unit. The same goes for store furniture made of wood, electronics and media, and items made of fabric such as toys, clothes, and upholstered furniture in a climate-controlled storage unit in order to make sure that they are kept in their best condition.
When deciding whether to get climate-controlled storage, here are questions you need to ask about the item:
- Can it get mould or mildew?
- Can it warp, crack, deteriorate, or become discoloured from interactions with moisture?
- Would high heat cause it to expand or contract?
- Is it designed to be stored at a certain temperature (for example, wine or artwork)?
- Is it sensitive to extreme heat or cold?
- Is it rare, sentimental, and/or valuable?
If your answer is yes, then it’s a good idea to rent a climate-controlled storage unit for those items.
What Things Need Climate Controlled Storage?
Here are some items that need to be stored in climate-controlled storage units:

1. Antique Wooden Furniture
Leaving antique wooden furniture exposed to the elements can damage its structure. The humidity and temperature fluctuations can warp, crack or rot the wood. This includes your antique wooden tables, chairs, bed frames, nightstands, and more.
So if you’re planning on storing them for a long time, then consider putting them in a climate-controlled storage unit
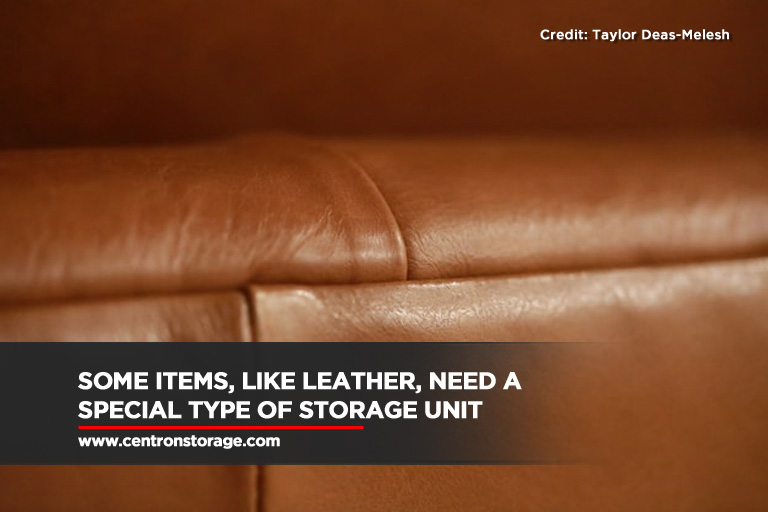
2. Leather Furniture
Leather is particularly sensitive to humidity fluctuations and can shrink, warp, thin out, and even get discoloured and mouldy through moisture when placed in regular storage.
If you have expensive leather furniture, it’s crucial that you put them in a climate-controlled storage unit if you’re living in areas where each season brings drastic weather changes.
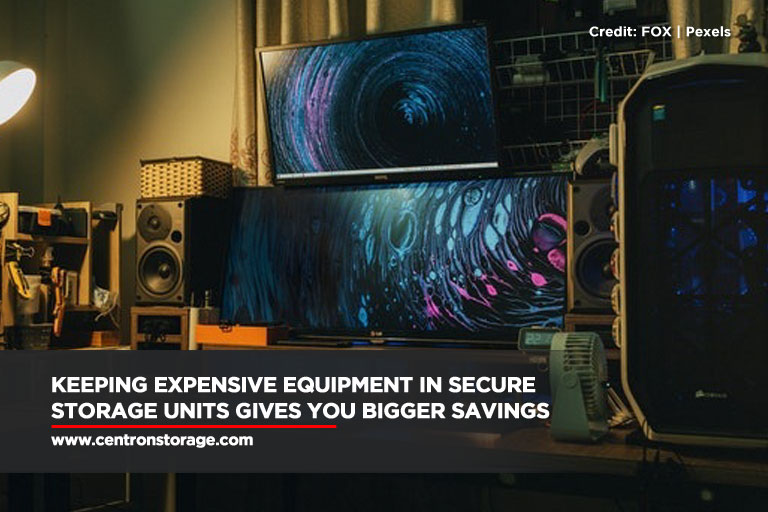
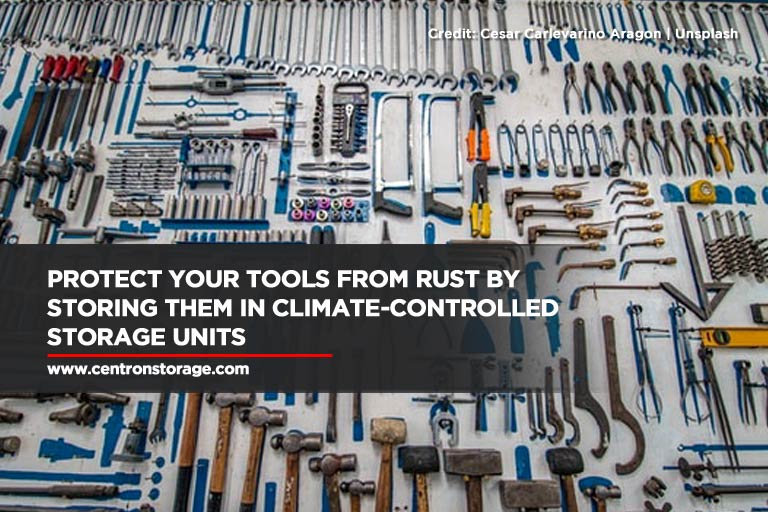
3. Consumer Electronics
Even small amounts of moisture can short circuit your electronics when you turn them back on after storing them for a long period of time. Rusting can also be an issue.
If you are storing your computer, computer parts, or any other types of electronics equipment, then a climate-controlled storage unit can prevent any moisture buildup.

4. Media Storage Equipment
DVDs, CDs, vinyl records, cassettes, software, or any other type of media storage are extremely vulnerable to moisture and major temperature shifts. A climate-controlled storage unit is a must.
5. Clothing
Seasonal clothing can be very expensive. Keeping them in a climate-controlled storage unit can preserve their quality for a longer period of time. This is especially true for heirloom pieces of clothing like wedding gowns and the like.
Before putting your clothes in storage, make sure they are clean and dry. You can also use plastic storage bins for additional protection against moisture.
6. Special Collections
If you have special collections, a climate-controlled storage unit is the best place to store them. Since your purpose of collecting these special items is preserving their quality for many years, they need to be under controlled temperatures. Changing weather conditions can damage them.
Such items include coin collections, stamps, comics, toys, and other collectibles.
7. Important Paperwork
Business documents and inventory, tax files, and other important paperwork should be carefully stored in a climate-controlled storage unit. This prevents those documents from getting dissolved, discoloured, faded, or rotted due to humidity. Monthly self-storage is considerably more cost-effective than replacing your inventory damaged by extreme weather changes.
8. Wine
Exposure to temperature fluctuations can accelerate the wine’s aging process, degrading its taste and quality. As a result, your wine can develop an unpleasantly metallic, oxidized taste. Not only will you not be able to drink it, but you will be wasting the time and money that you invested into your wine collection.
To avoid spoilage and support proper aging, you should consider renting a climate-controlled storage unit for your wine bottles.

9. Musical Instruments
A high-quality musical instrument is a costly investment, so you need to store these delicate items in units with climate control. Otherwise, your musical instruments can be damaged by humidity and temperature fluctuations. On top of that, high levels of humidity and heat can encourage corrosion and the growth of bacteria, which is extremely destructive to musical instruments.
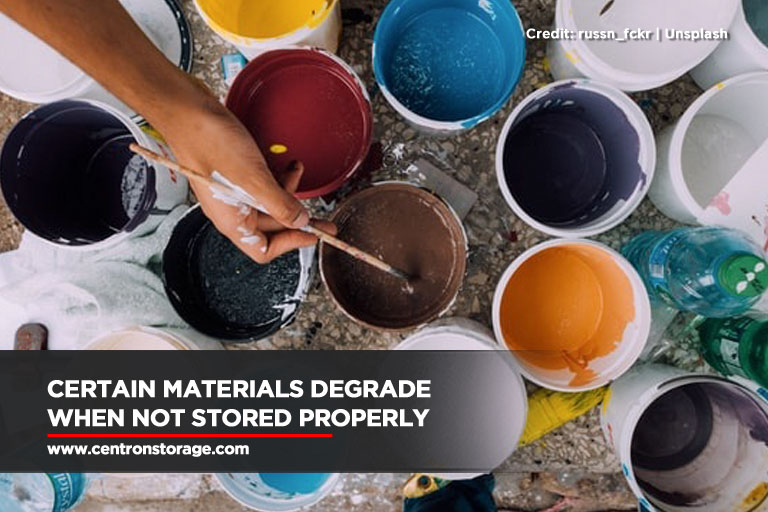
10. Artwork and Craft Supplies
The ideal environment for your artwork should be at 70 to 75 degrees Fahrenheit with around 50% humidity, which you can find in a climate-controlled storage unit. Your craft supplies can also benefit from being stored in a climate-controlled storage unit since the fabric is susceptible to moisture, UV exposure, and dust so keeping them under consistent temperature can be incredibly helpful.
11. Photographs
Climate control is very important when you’re storing photos. Heat can cause stacks of photos to deteriorate and fuse together. This can also cause images to fade. Additionally, you need to face the photos away from each other to prevent damage and ensure that those memories are preserved. They are, after all, irreplaceable.
12. Pharmaceutical and Medical Supplies
Pharmaceutical and medical supplies can degrade when it is stored outside its normal temperature range. Make sure that you check your prescription bottle for storage instructions and you’ll typically see a recommended temperature range.
How Much Does a Climate-Controlled Storage Unit Cost?
Climate-controlled storage units in Ontario go from $40 to $500 depending on the storage unit size and location, and if you’re living in areas where temperature and humidity are not consistent all year, then surely a climate-controlled storage unit is worth the extra price. It is always better to err on the side of caution and keep your items safe.
If you still can’t decide on whether to get a regular storage unit or a climate-controlled storage unit, check the storage unit sizes and prices and see if it is what you are looking for.
“Climate Controlled Storage Near Me”? That’s Us!
Centron Self Storage offers the best value for climate-controlled storage spaces in North York. Pay a visit to our store at 4500 Chesswood Drive and get a feel of how secure and safe your belongings will be in our facilities. Call (416) 739-0000 to talk to one of our storage experts today!
How Renting Self-Storage Saves You Money When Moving Provinces
Let’s face it: moving out can be daunting, especially when you’re headed somewhere out of your province. There’s an awful lot of work to do, and even the planning stages can be quite daunting, not to mention financially challenging.
You, however, have tons of options to ease up your moving experience. One of the most effective solutions is using a self-storage facility. Renting a storage unit comes in handy when you need a safe place to store your belongings while you search for a new home or while you finalize the papers for your new place.
There are other benefits to using self-storage that ultimately save you time, energy, AND money when moving out of the province.
1. Temporary Storage That’s Readily Available
Moving out compels you to do an overhaul on your list of possessions. You will likely not have to bring everything to your new home. However, if there are items that you are certain you cannot give up, and there’s nowhere to put them in just yet, a storage unit strategically located between your old and new addresses might just be right for you.
It helps to remember that you can rent self-storage to store, for the time being, appliances, furniture, seasonal clothing, and other expensive items that you cannot afford to leave behind. Compared to the costs of buying all those items brand new, the cost of renting a storage unit will offer much higher savings. Self-storage is the way to go, especially if you’re moving from one province to another.
2. Free Amenities
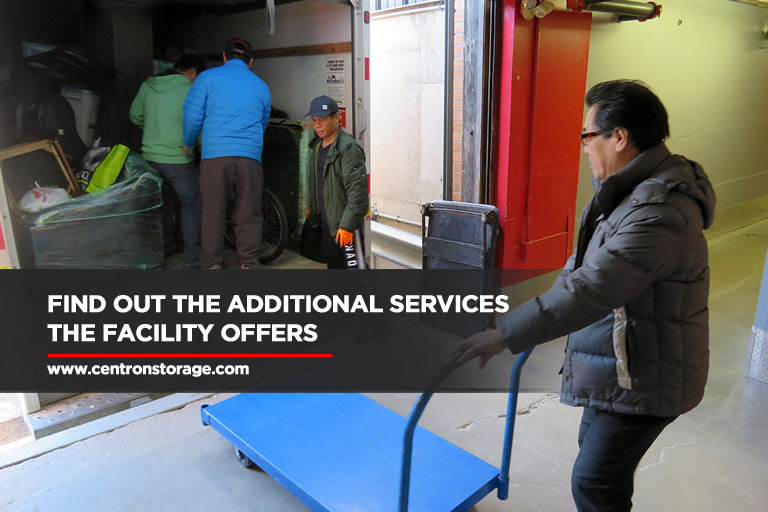
Self-storage facilities know that clients who are moving out have specific needs. They ease your moving experience by providing additional services on top of the storage unit:
- Logistics – Some facilities provide free moving trucks, and assist you when you’re loading and unloading your items. When you don’t have extra cash, your self-storage provider can help you with your logistical needs: whether it be placing your belongings in the storage unit or taking them to your new home.
- Safety and Convenience – When your facility offers logistical freebies, it follows that they would offer amenities. These include dollies for lifting and moving heavy objects, and pads to protect your furniture from dents and scratches when packing or unloading.
- Temporary Mailing Address – If you’re still in the process of packing and moving and you have regular packages or deliveries arriving, your self-storage facility can accept them on your behalf and place them in your storage unit. You can also ship items to the storage facility, while you’re still on the go. Retrieve them later once you’ve settled in your new address.
3. Security and Safety
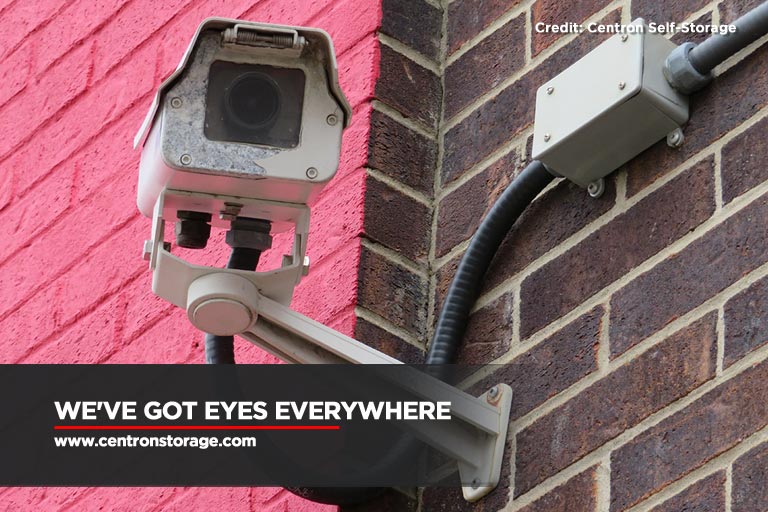
Self-storage facilities are protected with 24/7 surveillance systems to make sure that you won’t worry about getting their things stolen or destroyed. Some are even insured, so when things go south, you still get a certain amount of money despite the loss incurred by an untoward incident. There are also climate-controlled self-storage units that prove to be helpful for regulating temperatures — especially with the Canadian climate conditions.
4. Long-Term Reliability
Most storage facilities allow unlimited period rentals. They even give discounts when you get a long-term contract. Some offer free trial periods on selected self-storage units. If your new place proves to be too small for all of your belongings, renting a storage unit seems like the more viable choice over finding a bigger, more expensive place where all of them can fit.
I’m Moving out on a Budget. Any Helpful Tips?
If you’re strapped on cash but need to move out soon, you can save money by doing the following:
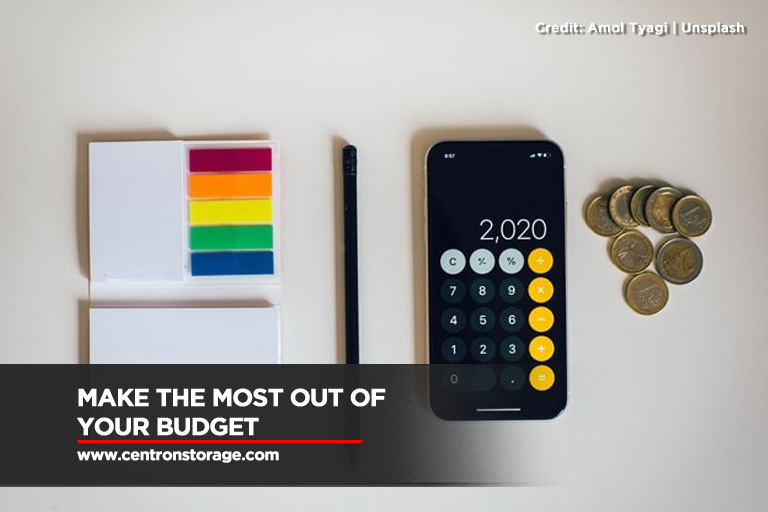
- Compare storage costs. Are you giving away most of your items or keeping them for later use? You certainly need to find a storage unit for rent if you’re taking them along with you. You can pay for the unit on a monthly basis and for a small fee. To save more, find a facility that’s strategically located between your old and new place so you don’t have to spend too much money on gas for long trips back and forth.
- Declutter. Knowing what’s important to you and what you can freely give away helps ease the moving out stress. There may also be items that you can sell for a cheaper price.
- Utilize existing household items for storage. Got plastic storage tubs, washing baskets, bags, and suitcases? You can use all of them as temporary storage hubs for your clothes, books, and other smaller, storable items.
If you’ve got drawers and are planning to take them along on your move, you don’t have to haul out everything that’s inside. Instead, keep them where they are, and cover the drawers with plastic cling wrap for security. Instead of buying bubble wrap, you can cushion fragile objects with linen and cloth.
You can also make do with garbage bags. They’re cheaper, and if you want to save the environment, you can always choose the biodegradable ones.
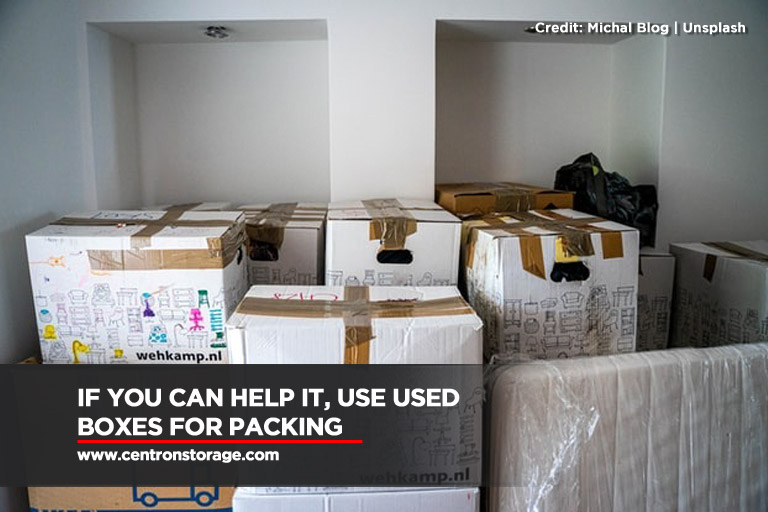
4.Don’t buy boxes. If you want to do it the traditional way (i.e. using boxes for storage), you can always find used boxes in your office. Ask colleagues to save boxes for you, before packing day, so you’re ready to get to work. Supermarkets, large outlet stores, sports and electronics stores, and garage sales are also good places to check out for boxes that are no longer of use. Some self-storage facilities also offer boxes as free amenities.
Crowdsource your social media for friends and mutuals who might have also moved in the past and have extra boxes lying around their homes. People are always happy to free up their spaces, while lending a hand to their friend. Imagine how much box money you can save!
5.Visit the discount store. Permanent markers and packaging tape look inexpensive per unit, but when you need a bunch for packing and moving, the total bill could shock you and your wallet. You can buy packing supplies such as colour coding stickers, labels, and storage items for a loonie or less at discount stores. If you’re buying ahead and have time to wait, you can order online from Dollarama, The Great Canadian Dollar Store, and Dollar Tree Canada.
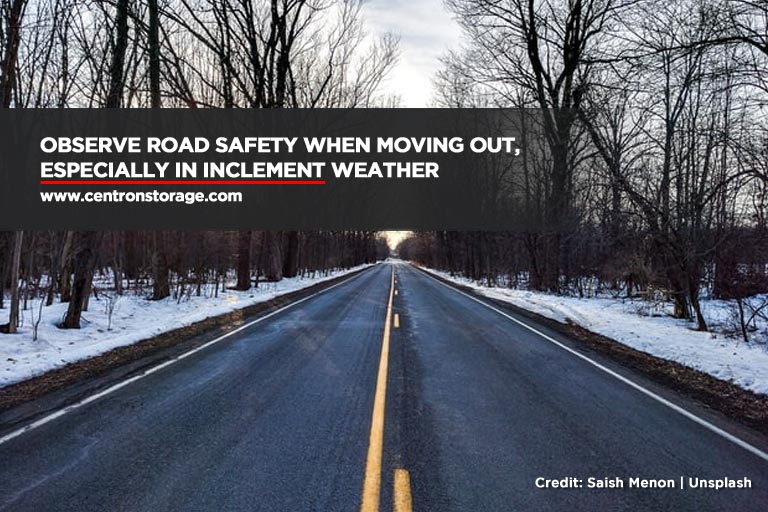
6.Move during off-season. Summertime seems like the ideal season for moving. The weather is generally friendlier, and you don’t have to worry about muddy puddles and slipping on ice. But if you can manage, try moving off-season.
-
- With most people moving during the warmer months, movers and storage facilities actually have promos during off-season. They have a more flexible schedule during autumn and winter, with less bookings. When there are fewer people planning to move, you might end up choosing the exact date you want your belongings to be picked up.
This gives you a chance to source the best deals and even try your hand at negotiating a lower rate. After all, this time of year, logistics and storage providers are actively looking for business.
-
- Avoiding peak moving season means avoiding heavy vacation traffic. This includes moving trucks. Because there are less people moving during autumn or winter, you won’t have to compete for space on the road at weigh stations and even truck stops, which may cause unplanned delays. It’s a smoother schedule for the move, and less gas expense.
Moving In or Out of North York?
Centron Self-Storage offers comprehensive storage solutions to keep your prized possessions in good condition. Let us free you from the stresses of moving into your new home. Call (416) 739-0000 to rent, reserve, or inquire for rates!
Self-Storage for the Self-Employed
If you run your own business — pandemic or no — chances are you’re looking to maximize your productivity and reduce your expenses. For the self-employed, renting an office or retail space will allow you to do just that.
Renting self-storage units is a viable solution for self-employed people who don’t have enough space in their own homes, or need to work outside most of the time. If you’re planning on starting your own small business, or are looking for ways to save money, read how self-storage can help you run your business smoothly.
Safely Store Your Goods and Inventory
For the self-employed, the question of storing your supplies and products in your home can be quite daunting. Do you have enough space to begin with? Will you be sleeping right next to all these boxes? Are the products safe from the kids and pets, or vice versa?
Space constraints at home are a major issue that most small business owners, especially those living in modest-sized spaces, cannot take lightly.
Every business has the option to store all their extra goods, seasonal items, supplies, and inventory into self-storage units. When the demand for your goods goes high, having spare storage space separate from your bedroom or basement will spare you from the hassle of trying not to topple down stacks of boxes that contain precious income-generating cargo. By placing all the extra items in a separate storage unit, you can avoid cluttering your own home.
If you operate your own small shop in town, renting a self-storage unit is a reasonable alternative to expanding your retail space. Warehouse storage is understandably too big and too costly for a self-employed business owner with limited stocks, so that’s out of the question. However, your business is still worth something. Getting yourself a self-storage unit with 24/7 video surveillance, exterior and interior lighting, heavy-duty fences, and electronic gate controls ensures that your business assets are stored safely and securely.
Protect Your Paperwork
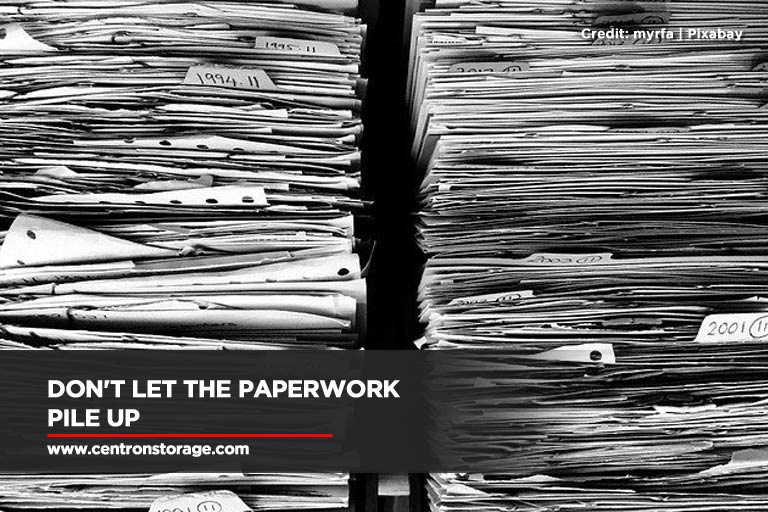
Never risk ruining important client files, transactions, and business reports. Every piece of paperwork you accumulate is crucial to the well-being of your business, and losing or destroying them may be detrimental in the long run. If you feel your home isn’t equipped to keep your paperwork safe, rent a self-storage unit.
Self-storage units are perfect for storing such important documents and archives. Besides the security features of these units, the climate control feature most providers offer also keeps them in excellent condition, protecting your client orders, business records, fliers, and contracts from humidity, pests, water, and temperature damage.
Sales professionals, lawyers, authors, and other self-employed people whose jobs rely heavily on paperwork will benefit from getting a self-storage unit for themselves. Compared to office spaces with longer rental terms, self-storage providers can offer shorter rental periods for lower costs on the renter’s part.
Great for Freelance Creatives
Just like other self-employed business owners, some freelance creatives find it a challenge to bunk up in their living space with tons of tools and materials lying around. Crafters, artisans, and painters might be used to having piles of clay, chisel statues, or paint canvases at home, but when the demand for commissioned work increases, it’s high time to look for a self-storage unit for rent that’s not too tight for your budget.
Arts and crafts materials are a tremendous investment, too. The more expensive the material, the more care and maintenance it needs from the creative hand that wields it. Self-storage units are a good way of preserving the usefulness of these materials. With climate control features, self-storage protects the painter’s paints, the sculptor’s clays, or the musician’s gear from the dangers of temperature changes, humidity, and moisture.
Service Contractors
Self-employed service contractors work out of their own homes, and go from address to address within a city. Some even work out of town, especially if their services are well-recommended and in demand.
If you’re a carpenter, plumber, electrician, cleaner, or any service contractor, you might start acquiring more tools and equipment to better your performance at your job. With a self-storage unit, you can stop driving around with all your equipment and paperwork in tow. Storing your equipment at home can also be a risk hazard, especially if there are very young children at home.
For service contractors who have a considerable number of clients in neighbouring cities and towns, consider renting a self-storage unit for your equipment in the area. Don’t keep your equipment in your car; doing so may attract unwanted attention from thieves. Renting multiple units across different locations makes it convenient for you to access your tools in different locations.
Accessible Temporary Storage
In the wake of the pandemic, small businesses were among the hardest hit sectors. Many, unfortunately, had to close up shop either temporarily or permanently. Some young self-employed business owners who were forced to shut down for good had to go back home to recover financially with the help of family.
If you’ve ceased operations for the time being or are relocating, opt for a self-storage unit to store your items until you get your shop back up and running. If you’ve ceased operations for good, a self-storage unit is also a great option for housing used equipment and tools you intend to resell. Storage facilities offer various room sizes that can accommodate your storage needs.
Whether you’re just storing boxes of unused supplies or your whole business in there, self-storage can free you from the stress of keeping your items safe while you think about the next steps to take for your business.
The biggest takeaway for the self-employed is how much money you can save up for other more important business expenses by renting storage space. Take advantage of the various offers of such facilities to get back up on your feet. You can select the right size unit for your belongings, access them any time, and get additional services from the facility at reasonable rates.
If you’re looking for self-storage units near you, Centron Self Storage offers a wide range of storage solutions for your business needs. We give you the best value for your money. Call us at (416) 739-0000 for inquiries.
Spring Cleaning Tips for Your Home: 2021 Edition
It’s April: the sun is up, the flowers, abloom. It feels like there is no better time to open up to the world to get something done after those long dreary winter nights. This seems to be why springtime is the perfect time for most of us to do house-wide decluttering, cleaning, and reorganizing.
With more time at home compelling us to pay attention to the dirty nooks and crannies we haven’t noticed before, there’s no reason not to get right down to it. Feeling the urge to pick up a broom or the vacuum cleaner yet? Start your spring cleaning at home right with these ideas and make this seemingly tedious work seem more palatable.
Make a Checklist

As with any laborious home task, the key to efficient spring cleaning is preparation. You need to know what needs to be done. A week or two before the actual cleaning, prepare a spring cleaning checklist.
- General
- Dust and clean windows and surfaces
- Sweep and mop the floors
- Vacuum rugs and/or carpets
- Water your plants
- Take out items for recycling
- Dispose of junk mail, free samples, and other items no longer of use
- Declutter
- Kitchen and dining area
- Clean heavy-duty appliances like the stove, microwave, refrigerator (including the freezer), and
- utensil organizers
- Organize the pantry by sorting out pots, pans, drawers, cabinets, etc.
- Choose items that you can give away
- Descale the coffee machine
- Check if knives and scissors are still functional
- Living room
- Dust and disinfect (or wash) the coffee table
- Clean the entertainment system (using products safe for electronics)
- Fluff or wash throw pillows and/or pillowcases
- Check the sofa if it needs upholstering (leather), or deep cleaning (other material)
- Organize CDs, DVDs, video games, and other entertainment system items
- Declutter the bookshelves, and organize remaining books and other reading materials
- Bathroom and laundry area
- Deep clean the showerhead, toilet, sink, and bathtub using strong cleaning product
- Check for damages on the bathroom floor, bathtub, sink, and other areas
- Get rid of empty bottles and containers, and expired/unused beauty products
- Organize the medicine cabinet
- Replace short-term items like toothbrushes, shaving razors, and shower caps
- Check if your shower liner or curtain needs replacement
- Take out used clothing or towels left by other family members
- Bedrooms and Closets
- Declutter dressers, wardrobes, closets
- Throw out clothes that have been worn down, and are unusable
- Organize clothes by colour, by fabric, or any way you are comfortable with
- Check for insects living in corners, and dust and clean away
- Wash the beddings
- Replace dirty sheets, pillowcases
- Garage and Car
- Declutter, and set aside items you can sell, give away, or throw away
- Reorganize the space inside so you can move around better
- Rearrange tools and equipment
- Check if your overhead doors are rusty, and grease if they are
- Check if the car interior smells, or has dirty spots
- Throw out any garbage inside
- Check for damages in the windows, wipers, tires, and other peripherals
- Wash the car, deep clean the windows, windshield, and wipers
- Vacuum the seats and the floor
- Replace car floor mats, if necessary
- If you can’t wash the car yourself, take it to your local car wash
- Schedule an oil change, safety inspection, or tire replacement
- The Outside
- Check your lawn and your roof to see what needs cleaning, repairs, or replacement
- Cut the grass, or prune the trees, if you have any
- Rake the leaves, and throw away broken branches
- Pick up any trash
- Clean the gutters
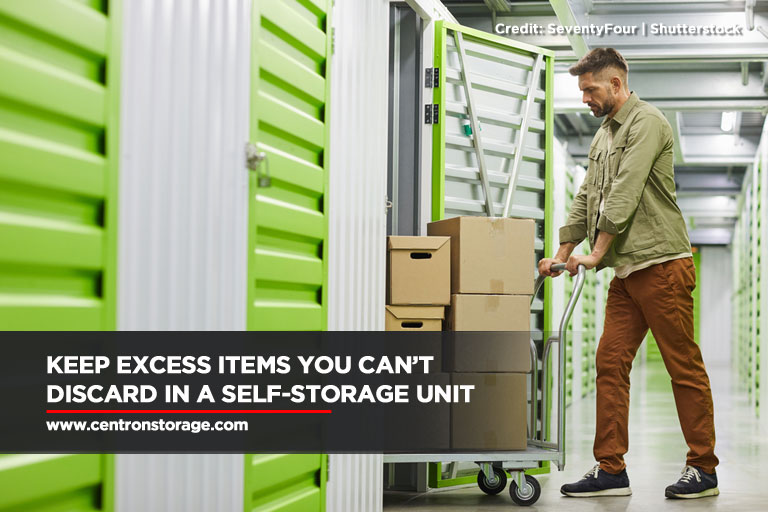
An additional tip: Decluttering can be difficult, especially if certain objects have sentimental value. However, you don’t have to get rid of them for good. Renting a self-storage unit will allow you to hold on to these items while clearing up space in your home. Entrust these precious objects to a reliable self-storage company to keep them well-preserved.
Checkpoint: Cleaning Supplies and Equipment
What even is cleaning without the cleaning materials? Along with your task schedule, don’t forget to sort out all that you need for cleaning and organizing your house. Household Management 101 suggests this ultimate home cleaning checklist:
- Equipment – Check if these are available, or if you need to purchase a new one:
- Dust mop and wet mop
- Dust cloths and dusters
- Rags, towels and soft cloths
- Indoor and outdoor brooms, and a dustpan
- Vacuum
- Toilet brush and brush caddy
- Plunger
- Spray and squirt bottles
- Squeegee and sponges
- Scraper, scrub brush, and toothbrush (for harder to reach surfaces)
- Buckets
- Cleaning apron, rubber gloves, and other protective equipment
- Cleaning caddy
- Cleaning Products – Check if you need a refill, or if your stocks have expired:
- Cleaners (all-purpose, disinfectant, glass, abrasive)
- Mild detergent
- Household ammonia
- White vinegar
- Baking soda
- Chlorine bleach
- Metal and furniture polishes
- Spot carpet cleaner
What It Means to SANITIZE in this Pandemic

The new coronavirus can stay on a surface from 24 hours to a full week, depending on what the surface is made of. Your house has a number of high-touch areas (like the kitchen) and objects (like tables, countertops, doorknobs, light switches, handles, handrails, and your personal electronic devices). Pay more attention to the level of cleaning you do on these surfaces, so you can protect yourself and your family from possibly getting infected.
- Before buying your disinfectants, check whether your go-to brands can help prevent the spread of COVID-19. Health Canada assigns an 8-digit Drug Identification Number to products that are approved safe for use in the country.
- Before using any product, read and follow the usage instructions carefully. The efficacy of some products relies on contact time. When spraying and bleaching, make sure the area is well-ventilated. Cover up with a mask and gloves.
- Use a damp rag or mop when deep cleaning. Sweep or dust gently to prevent the distribution of virus droplets in the air.
- Place all used items (like wet mop heads, cloths, and disposable gloves) in a separate trash bag before putting it in the regular waste bin. Wash all reusable cleaning items with laundry soap and hot water. Keep the washed items out of reach after drying. Do not reuse gloves.
- Wash your hands thoroughly after cleaning. Use soap and water.
- Clean and disinfect more than usual. Provide disinfecting wipes to family members, or visitors (service providers, and neighbours), and have them observe proper disinfecting on the aforementioned high touch areas in the household.
Never Forget These Safety Procedures
- Avoid wet floors, and mop up as often as needed. Don’t let the kids near wet surfaces.
- If you’re using a step stool, make sure you plant it on a level surface to avoid accidents. Set the stool as close as possible to your target area so you won’t need to move around too much, or stretch too far.
- Be careful when lifting heavy objects, or moving furniture. Ask for assistance if you know you can’t do it by yourself. Prevent injuries by bending with your knees (not your back), and using your leg muscles.
- Replace your mask and gloves after one task is over.
Have Fun!
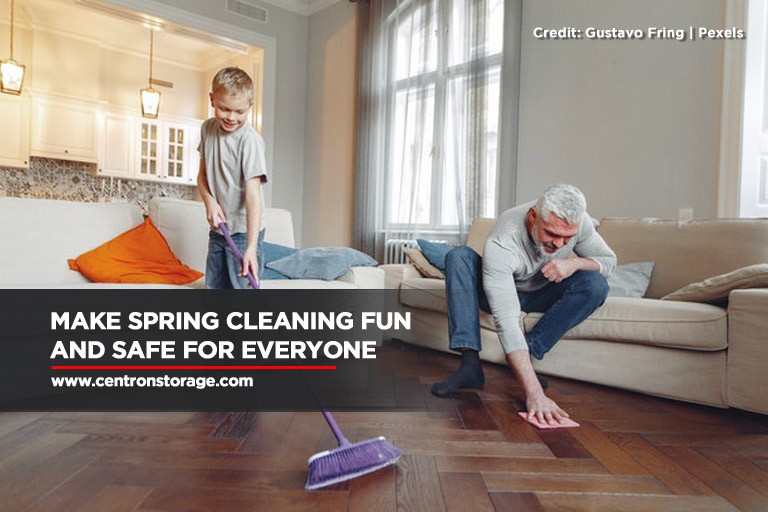
One more important spring cleaning tip: make it a fun and exciting activity! Make it a family thing, or invite a friend over to help you with your tasks. You can put on some music, and hum along. Reward yourselves with a nice meal and drink afterwards. Find a way to make your spring cleaning worthwhile.
Got Extra Stuff in Storage Limbo?
We know you have lots of things you don’t want to throw away just yet. If you’ve done your spring cleaning, and brought out a considerable amount of “Can I keep this” clutter, we might have storage space for you! Call Centron Self Storage at (416) 739-0000, and get your first four weeks for free!
7 Ways To Store Your Snowboards and Skis
If you’re the type of person who loves to stay active in the winter, then you’ve probably seen your fair share of action down those snow-covered slopes. After all, nothing beats the thrill and excitement of snowboarding or skiing during the wintertime.
With the last vestiges of winter melting away, it’s time to pack up and put your skis and snowboards back into storage. However, you have to store these types of equipment properly. Otherwise, they will deteriorate and become unusable.
If you want to make sure that your snowboards and skis are in top shape for the next winter, you need to know how to store them properly. To help you get started, here are effective snowboard and ski storage ideas.
How Do You Store Snowboards and Skis Off-Season?
Storing your snowboards and skis for the off-season will require proper preparation and planning since they’re going to remain untouched for quite a long time. Throwing them into a shed somewhere and calling it a day isn’t going to cut it if your end goal is to keep these pieces of equipment in excellent condition.
1.Check Your Snowboards and Skis for Damage
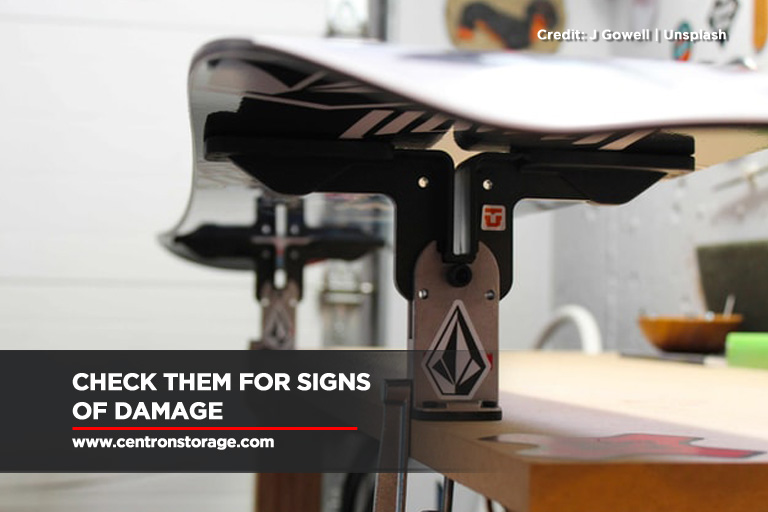
Going down those icy slopes is exhilarating at high speeds. However, if your skis and snowboards are damaged, not only will it affect performance, but might be a safety hazard and will put your life at risk. So before you put your winter sports equipment into storage, the best thing to do is to check for damage and, if possible, do some repairs.
Here’s what to do:
- Check your snowboards and skis for little cracks and chips on the sidewall and top sheet. This allows water to seep into the wood core of your equipment and results in a loss in stiffness and flex.
- Get rid of the remaining water and apply epoxy resin on the damaged areas of your skis.
- Use a metal scraper or sharp knife to and gently scrape the glue from the edges.
- Sharpen the edges and remove obvious burrs. This will reduce the chances of the edges rusting during storage.
- If there are signs of rust, use a gummy stone, Scotch Brite pad, or medium steel wool to gently remove rust.
- If the damage on your gear is extensive, bring it to the shop and have a professional take a look at them.
- If repairs are impossible, then better to opt for a replacement.
2.Clean Your Skis and Snowboards
After using your skis and snowboards down those slopes, dirt, salt, mud and other bits of debris might have latched onto your gear. The first thing you need to do is clean these substances off your equipment.
Cleaning your skis and snowboards before storage is an essential step since:
- Removing harmful substances, such as salt, from your snowboards and skis will prevent corrosion and structural damage.
- Cleaning will keep your winter sporting gear from being a breeding ground for harmful bacteria.
- Clean snowboards and skis are easier to check for signs of wear and tear.
When cleaning your snowboards and skis, you need to pay attention to a couple of things to make it effective and prevent damaging your equipment:
- Use a garden hose and spray water on your equipment thoroughly. However, avoid forcing water into the bindings as much as possible.
- Do not use detergent or degreasers because they could negatively affect the lubricant on the bindings.
- For grease or spring pollen build-up that has gotten stuck on the base, use a piece of cloth dipped in a small amount of citrus solvent.
3.Apply Storage Wax
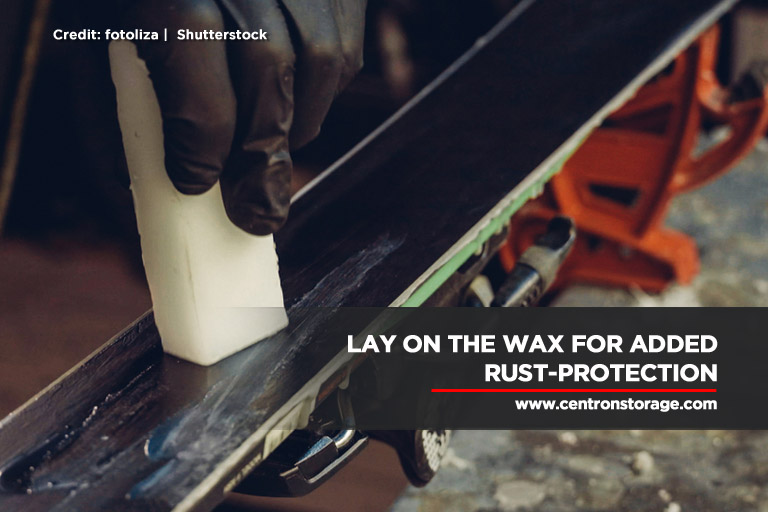
Waxing is one of the most important things in preparing your snowboards and skis for storage. Storage wax protects the bases from oxidation, moisture, dirt, and prevents the build-up of rust during storage.
When applying wax on your snowboards and skis, make sure to do the following:
- Don’t scrape off the residual wax from before. This adds an extra layer of protective coating.
- Make sure to apply a generous amount of wax all over the base using a waxing iron at low heat.
- Use warm weather or all-temperature wax if you can.
- Cover the edges with was to keep them from rusting.
4.Look for a Good Storage Location.
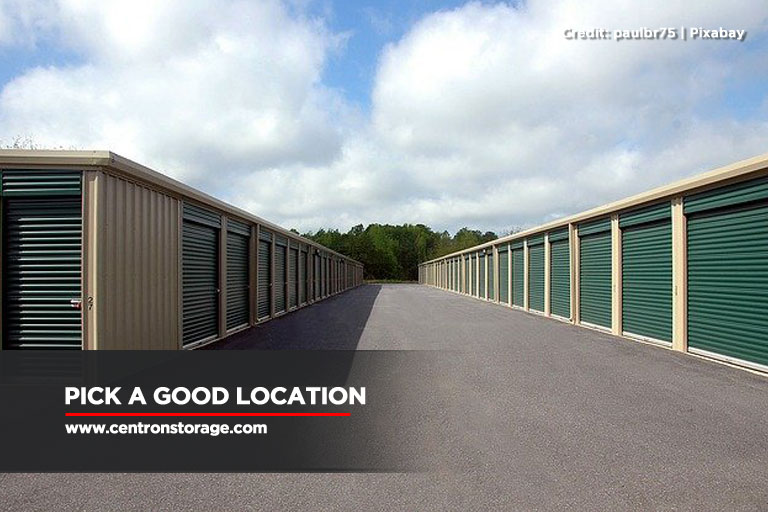
Your storage location matters in terms of keeping your snowboards and skis in perfect condition during the long idle period. Store them in an area that is not prone to super high or super low humidity since both can cause adverse effects on your winter sporting equipment.
In low humidity areas, here are the effects on snowboards and skis:
- Low humidity can lead to delamination of your skis by heating up the glue that binds all the layers of the gear together.
- Low humidity can cause the equipment to dry out and become stiff.
- Low humidity can make the interior of the board lose its shape.
In areas with high humidity, the effects are as follows:
- High humidity can encourage mould and mildew to grow on your skis and snowboards.
- High humidity can cause the edges to corrode and rust.
Find an indoor area that is cool and dry, preferably those with temperature and climate control, for the ideal snowboard and ski off-season storage.
Here are recommendations on where to store your gear for the off-season:
- The bedroom
- The coat closet
- Under your bed
- On the living room wall
- A self-storage unit
5.Wrap Your Equipment
You may have cleaned and waxed your winter sports equipment and found a suitable storage location, but your snowboard and skis are still susceptible to harmful elements including:
- Dust
- Insect infestation
- Scratches
- Accidental spills
Wrapping them in a plastic wrap or keeping them inside specifically made ski or snowboard bags can add an extra layer of protection for the long storage period.
6.Store Your Snowboards in the Proper Position
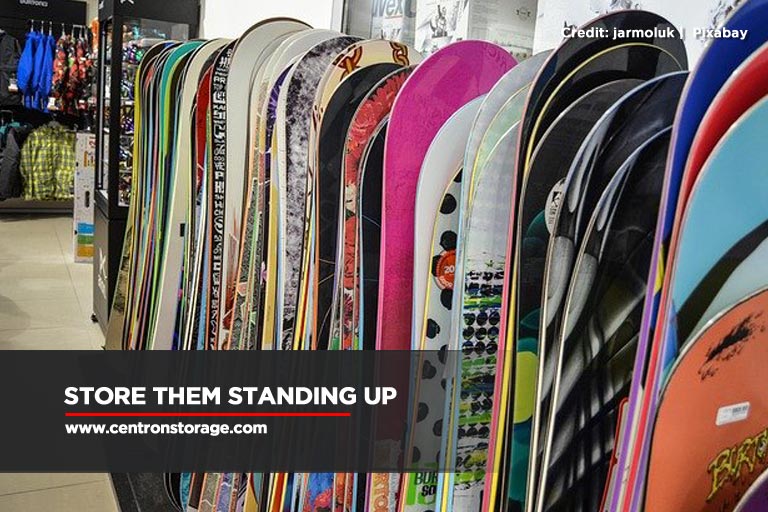
For snowboards, storing them lying down on a hard surface over a long period of time can have adverse effects, especially when something is placed on top of them. It can put pressure on the camber or rocker sections and can result in them flattening out.
To avoid this, a great snowboard storage idea is to store your snowboard in the right position. Here’s how to do so:
- Store your snowboard standing up on its tail.
- Lay them down on a carpeted area.
- Hang them on a skateboard rack on your wall.
7.Strap Your Skis Together
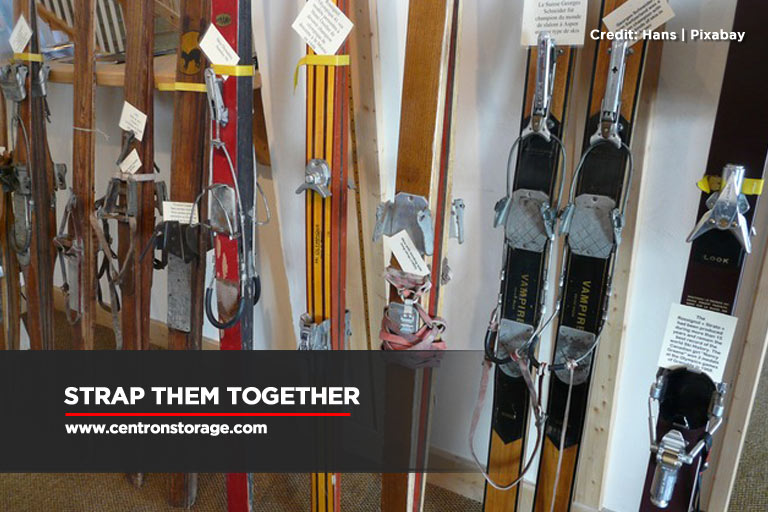
Skis can accidentally bend out of shape if you don’t store them the right way. An excellent ski storage idea to sidestep the problem is strapping them together — but not too tightly.
After that, you need to store them in the correct position that doesn’t place any strain on them. Here are the ways to do it:
- Lean your skis on other objects
- Hang your skis on a skateboard rack
- Lay your skis on their sides on the ground.
It’s going to be a while until the next snowfall, so your skis and snowboards will be left unused for months on end. By following these effective snowboard and ski storage ideas, you will be able to keep your equipment in perfect condition for the next winter activity.
If you’re looking for an excellent storage solution for snowboards and skis in the North York area, contact Centron Self Storage at (416) 739-0000. We offer great deals and will be happy to provide you with the best service possible.
9 Effective Ways Prepare Your Snowmobile for Off-Season Storage
Wintertime is coming to an end, along with it the usefulness of various winter-related equipment like your skis, sleds, and snowmobile.
However, while storing some of these items may be simple and straightforward, placing your snowmobile in storage during the off-season may require more time and consideration. It’s a complex machine with moving parts, electronics, and other components that don’t do well when idle for a long period of time. Carelessly storing your snowmobile will just cause more harm to the vehicle than good.
To prevent any damage, know what you need to do to get it ready for its long nap until the next winter season.
How to Prepare Your Snowmobile for Storage
There are quite a number of things to be done to have your snowmobile prepared for. The main goals for the preparations you’re about to make are to make sure that important components stay functional and prevent moving parts from getting stuck due to corrosion over the long storage period.
1.Clean Your Snowmobile Before Storing it
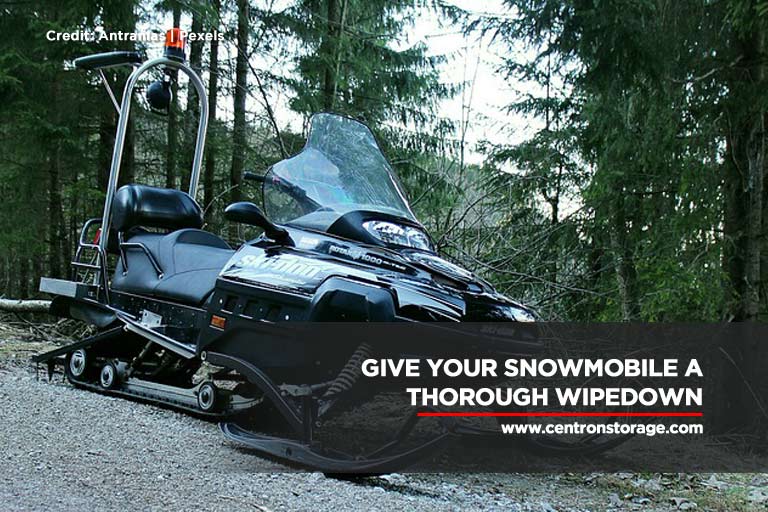
Your snowmobile has seen its fair share of action over the winter. While driving your vehicle over the snowy terrain, bits of dirt, mud, and other bits of debris has gotten stuck onto the machine’s exterior and exposed parts like the suspensions, springs, skis, and the track.
The first thing you should need to do before hauling your snowmobile off to a garage or storage unit is to clean it first. Cleaning your machine is essential for a number of reasons such as:
- Cleaning your snowmobile can prevent abrasion and corrosion damage from harmful elements such as salt to the vehicle’s structure and parts.
- Removing debris such as rocks, and dirt build-up will ensure that moving parts such as gears and tracks can still function smoothly the next winter.
- A clean snowmobile is easier to inspect for signs of wear and tear.
- Cleaning helps reduce the breeding grounds for harmful bacteria.
When cleaning your snowmobile, here are important things to remember:
- Use warm, soapy water on the hood, tunnel, seat and nose pan and rinse it thoroughly. Make sure all the mud and debris are totally removed.
- Spray grease-cutting cleaner under the hood.
- Spray engine degreaser near the oil reservoir and exhaust ports. Rinse well after.
- Polish your snowmobile with the recommended wax.
2.Apply Rust Prevention Measures
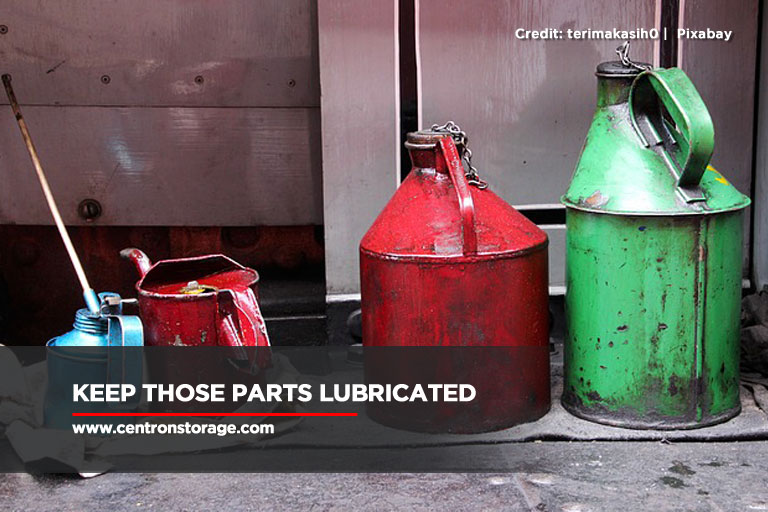
After cleaning your vehicle, the next step in the snowmobile storage preparation plan is to employ rust prevention measures. Condensation cause parts to deteriorate during the long, idle period and they can compromise your machine.
Taking preventive measures against rusting is key to ensure optimal performance and functionality. Here’s what you have to do:
- Apply the recommended type of grease to any area where fittings exist.
- Check nuts, bolts, suspension rails, and other parts for any signs of rusting and have them replaced.
- Spray lightweight oil such as WD-40 on all-bare metal surfaces.
3.Maintain the Fuel System

Before putting your snowmobile to sleep, one of the most important tasks you have to perform is to keep the fuel system properly maintained. One thing that you have to remember is to never store your snowmobile with its tank empty. This is essential because of the following reasons:
- Storing a snowmobile with the fuel tanks empty can cause the seals and the gas gauge to float to dry out and become damaged.
- A snowmobile’s engine parts rely on fuel for lubrication and protection, especially when not in use.
- Emptying the tank is only applicable to older models that use a carburetor system.
To ensure that your snowmobile’s fuel system isn’t compromised during storage, make sure to fill the tank. There some things to take note of:
- Make sure to add a fuel stabilizer to prevent gasoline solvents from breaking down and causing corrosion in the carburettor.
- Run the engine for a short time before storing your vehicle.
4.Make Sure to Remove the Battery and Drive Belt Before Storage
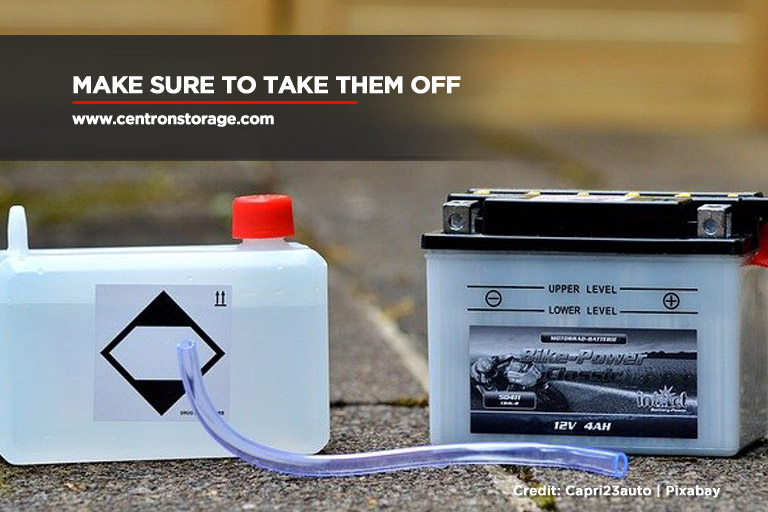
Do not store your snowmobile with the battery still attached. Take out the battery and store it in a cool dry place away from sunlight or, if possible, a temperature-controlled area. Furthermore, make sure to charge the battery once a month using a small charger.
In addition to the battery, make sure to remove the drive belt from your snowmobile. There are important reasons for doing so, such as:
- Removing the belt will keep it from settling to its installed shape. If you don’t, this might prevent it from rotating properly the next time you use it.
- Taking the belt out reduces the risk of condensation building up between it and the clutch.
5.Fog the Engine If Necessary
One way to prevent moisture from damaging your snowmobile engine while in storage is to do fogging. This process involves coating your machine’s crankshaft bearings, connecting rods and other engine parts with fogging oil.
The fogging oil displaces moisture from the metal and forms a protective coating. This helps prevent air and moisture from causing corrosion, which makes the parts prone to failing.
6.Cover Your Snowmobile
Even when placed in a proper storage room, your snowmobile is still susceptible to dust, scratches, and even rodents. The best way to prevent this is to cover it with a soft, lightweight and breathable cover. You can also cover the intake holes and the muffler outlet with steel wool to keep rats and mice out.
7.Look for a Good Storage Location
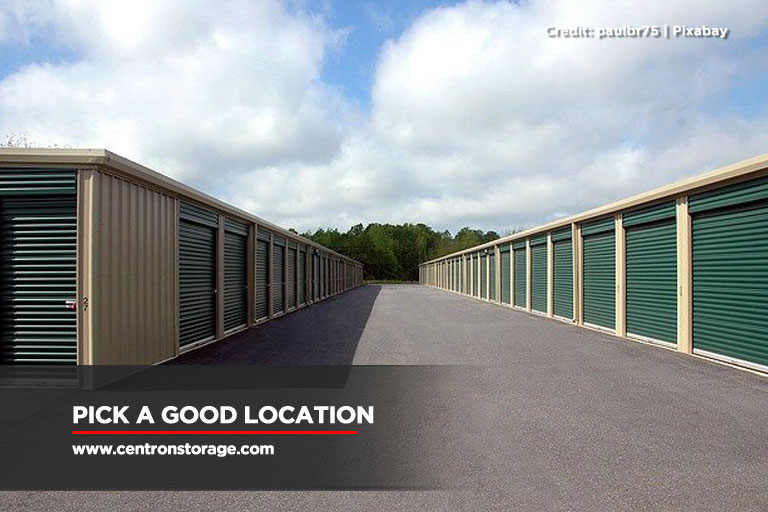
Placing your snowmobile outside will just expose it to harmful elements such as rain, harsh sunlight, and dust which will hasten the damage to important components. If you want to extend the life of your machine, pick a proper storage location for the off-season.
While a climate-controlled room might be ideal, a clean garage or storage unit are perfect alternatives. Just remember to keep the snowmobile away from direct sunlight or wet areas.
8.Keep Your Snow Mobile off the Ground
One of the best snowmobile storage ideas is to keep your machine off the ground while in storage. You can do this by doing the following:
- Elevate the rear end of the vehicle by placing a jack stand under the rear bumper. After that unhook the springs
- Lift the snowmobile and set the chassis on a wooden box or crate so the front suspension can hang freely.
Keeping your snowmobile off ground is quite beneficial since it takes the tension off the springs and helps them last longer.
9.Start Your Snowmobile Up Once a Month
Make it a point to take your snowmobile out of storage and start the engine up once a month. By doing this, you prevent sediment from settling and the seals from drying out.
Your snowmobile is a valuable investment, so it’s essential that you keep it safe during storage. By following these storage tips, you’ll be able to ensure that your machine is in top shape for the next winter ride.
If you’re looking for an excellent storage solution for snowmobiles in the North York area, contact Centron Self Storage at (416) 739-0000. We offer great deals and will be happy to provide you with the best service possible.